Thursday, October 31, 2013

Penny Black 3 headed monster Halloween card


Hi blogging friends From Millan.Net

A special welcome to my new Followers!  Thank you for taking an interest in my craft.  If you ever have any questions, please don't hesitate to drop me an email.  My email address is in the LH sidebar of my blog - just scroll down a little till you see where you can click on a link.

Today I am sharing a Halloween card which I made for my daughter.  The image is a very recent purchase - a Penny Black one of course - which I thought was really cute.  I don't really go for all the super-scary Halloween images and neither does my daughter so I thought this one was perfect for her: 


When I was at my local Art Supply Store, I noticed that they had a small range of Tombow Watercolour pens on sale for $1 each which was a bargain!   I have ALWAYS wanted to try my hand at using Tombow pens but they are really expensive and I couldn't justify buying a pack that in Australia costs $37+ for ten colours and then finding that I don't like them.  It was really just pure luck that the colours that my local store had were all colours that I knew I would use.  And I have to say that I absolutely LOVE them and found them really easy to use and actually alot quicker than using coloured pencils.  I have coloured a couple of images with them and hope to make them into cards as soon as I get a chance.

To be honest, there wasn't really alot to colour on the image as you can see - only the eyes, the shadows on the sheets and the little bits of tail and the ground.  To make the sheets look white against the background, I chalked around the sky with blue chalk which tricks your eye into thinking that the sheets are white when in fact, they are just the same colour as the watercolour paper.  I added some Glossy Accents to the eyes to make them stand out a little more. 

The spider web is a Memory Box die which I trimmed down by about half then popped the diecut spider on the top with a pop-dot and bent the legs down a little to give it some dimension.  I added Glossy Accents to the spider body and legs which makes him look a bit more real.  Personally, the only spiders that I like are dead ones and where I grew up on our farm, we had many, many Huntsman spiders which are massive (*shudder*) - and I mean like 6 inches (or 15cm) across.  I hated them because you would go to bed at night and when you woke up in the morning, you would look up at the ceiling directly above your bed and there would be one there!  Worst thing was that they moved very quickly and could drop suddenly - eek, I am scaring myself so I shall stop talking about them........

The sentiment is by Technique Tuesday and I ran my orange inkpad around the edge.

The designer paper has been in my stash for ages but I am sure you could substitute any of the large variety of Halloween papers that are around.  I ran it through my Big Shot using my Textile embossing folder then lightly sanded it with my sanding tool.  I also sanded the orange and black cardstock although you can't really tell from the photo.

Here is a pic of the inside where you can that I mirrored the card front as far as the layers go:


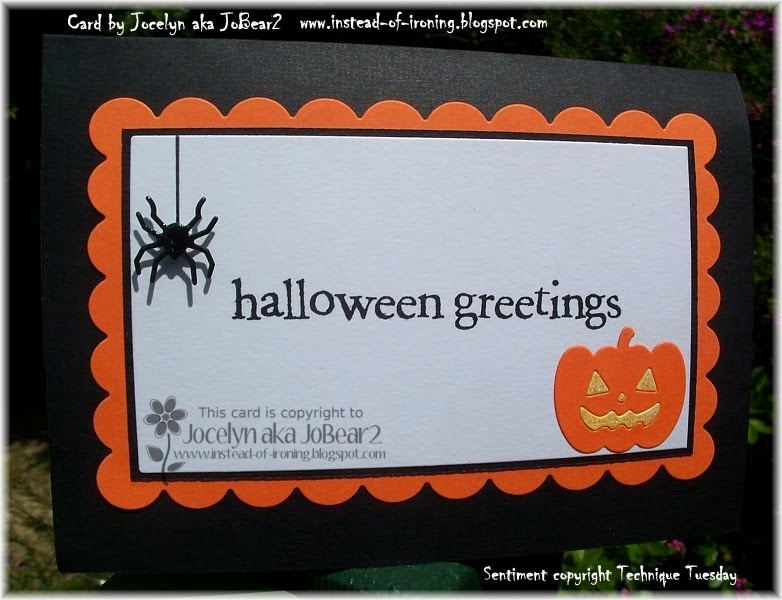
Again, the spider is a diecut which I covered with Glossy Accents and is popped up which is why there is the shadow of his legs on the photo.  I drew the line with a black pen.  Here is close-up - pretty creepy, huh!?


The sentiment is by Hero Arts from their Happy Halloween clear set.  The pumpkin is a die from a Halloween set by Impression Obsession.  I diecut the pumpkin again with yellow cardstock then popped the eyes, nose and mouth in and added Kindyglitz Crystalina glitter glue to add some sparkle.

I am entering my card in the following challenges -

Clear it Out Challenge Blog - Halloween and anything orange from your stash - I used the black and orange designer paper which is from 2008!

Simon Says Stamp Wednesday Challenge - Anything Goes

Happy Halloween to my USA fans and to those of you who celebrate the occasion.  Last year, we had one group of Trick-or-Treaters pay us a visit which was the first time in 10 years after having a little stash of lollies every year just waiting for someone to stop by.  Probably one in 50 houses in our area do some sort of outside decoration but I have noticed that our local supermarket and K-Mart/Target are selling a much greater variety of Halloween stuff than they used to.   

Thanks for stopping by!

Jocelyn


Card Recipe:

Stamps:  Penny Black 3-headed Monster 2532K wood mount, Sentiment from Technique Tuesday Halloween Seal clear set (card front), Sentiment from Hero Arts clear set Happy Halloween CL353 (card inside)

Ink:  Ranger Jet Black Archival ink, Colorbox Orange pigment

Designer paper:  Making Memories Brocade Orange Spellbound (retired)

Accessories:  Big Shot, Memory Box dies - Scary Spiders #98704 and Creepy Web #98158, Impression Obsession die set DIE114-O (pumpkin), Lifestyle Dies:  Nesting Circles, Nesting Rectangles and Nesting Scallop Rectangles, Cuttlebug Textile embossing folder, Perfect Layers Tools, pop-dots, We R Memory Keepers sanding/distressing tool, Glossy Accents, Tombow pens, Kaisercolour blue chalk, Kindyglitz Crystalina glitter glue, black pen, 140lb Watercolour paper, paint brush, cardstock - black, orange, yellow

Punches:   EK Success Arrows border

Wednesday, October 23, 2013

SCS October Fan Club Brayered Christmas card


Hi blogging friends From Millan.Net

When I saw that the Splitcoaststampers October Fan Club challenge was "sleigh", I thought I would use a silhouette Santa and sleigh image over a brayered background just for something a little different to the norm.  Now, I haven't used my brayer for ages so it took a bit of getting used to again as I practiced and practiced on my glossy cardstock.  With the help of my blogging friend Shaz's brayer instructions/tips (from her blog Calligraphy Cards - Shaz in Oz), I managed to tame the brayer beast enough to be happy enough with what I achieved.  And I hardly made any mess which is a first for me as when I have brayered in the past, I have had ink everywhere and just got so frustrated and annoyed with myself.  I think perhaps that learning the right technique has had a lot to do with it.  I do LOVE the look of brayered backgrounds and I should use the technique more often now that I have a little more confidence - thanks Shaz :-) 

By the way, Shaz has some Blog Candy for her followers to celebrate her 3rd Blogaversary coming up in November.  You can find the details about it HERE.

 
The Inkadinkado Silhouettes stamp set that I used for the trees and the Santa plus sleigh is RETIRED but Inkadinkado have a different Silhouette set which would suffice HERE (my link goes to 123 Stitch in the USA who I have been buying from for several years - they are fantastic!).  Visible Image Stamps (from the UK) have a Sleigh Silhouette stamp HERE (I have bought from them before but not for a couple of years).  And lastly, Impression Obsession have a Santa and sleigh die HERE (this is an Aussie store as an example who I buy from alot - also fantastic - but if you are not in Australia, you should easily be able to buy this die from elsewhere).  There are tons of brands of tree stamps around so I won't bother listing any as you should be able to find a similar tree somewhere - plus you could even use a tree die instead.

The ink that I used for the brayered blue background is by Kaleidacolor - Blue Breeze - and as you can see, I went from dark blue at the top to light blue at the bottom.  For some reason, the photo looks a bit patchy on my blog post but the photo I am using from my laptop has the colour graduation super-smooth - weird - although I did use a different photo editing program as the LCD screen on our main home computer failed yesterday and I don't have the same editing program on my laptop. 

I stamped the trees using Stazon Jet Black and stamped some without re-inking to give the impression of depth.  The Santa and Sleigh Silhouette was also stamped with Jet Black ink and I practiced on a few scrap pieces of glossy cardstock beforehand because the stamp slips very easily when you stamp it on this particular type of cardstock which will blur the image and spoil it.  I diecut a small circle of glossy cardstock for the moon and sponged on some Colorbox Bisque (yellow) chalk ink with a sponge then stamped part of the silhouette image on the moon and simply glued the circle to the background matching up the reindeer.  I have found this method works better for me than masking off a circle for the moon and then brayering over the top as I would always end up with ragged edges on the moon and I just didn't like how it looked.  Either that or the ink would soak through the mask which would ruin the whole effect :-(  The method I use is far simpler and waaaay easier.

Once the trees were dry, I rubbed my Anti-Static pad over the bottom of the trees and stamped my sentiment using Versamark Watermark ink and heat-set it using White Detail embossing powder.  Whilst it was still hot, I poured on Bubble Fizz fine glitter and then heat-set it again - but you have to be careful not to overheat the embossing or it will go flat.

I used a finger dauber and Ranger Picket Fence (white) Crackle Distress Paint to sponge around the edges of my image panel to give the impression of cold, snowy conditions.  The white dots of snow on the trees were done with a Uniball Signo White pen which I picked up from my local newsagent.

Here is a close-up of the reindeer:


Did you notice the tiny little red nose?  No?  Click on the image to see a bigger view.  See it now?   I didn't have a rhinestone or pearl tiny enough so I used my Ruby Red Liquid Pearls.  Again, I practiced on a scrap piece of glossy cardstock so I knew how much to squeeze the bottle to get a tiny little dot.   It is hard to tell in the photo but I went around the edge of the main panel with Kindyglitz Crystalina glitter glue then popped the panel up on dimensionals.

The designer papers are by Lili of the Valley (UK) from their Frosty pad.  I again used Picket Fence paint around the edges of the base panel.  The side panel was punched using an EK Success Scalloped Scallops border punch.   All the layers were trimmed to 1/16" using my Perfect Layers Tools.

The white organza ribbon was attached in a separate elements and the bow itself was made using my Bow Easy which was glued on using Fabric Glue.  I added Fray Stop to the cut ends to stop them from fraying.

I didn't really want to do too much embellishing as is my usual style and thought just adding the 3 diecut My Favorite Things Snowflakes was enough.  I only glued down the centres using Tombow Mono glue and bent the points up a little.  I added a light blue Kaisercraft rhinestone to the centres.

Challenges:

Apart from the SCS Fan Club Challenge, I am entering my card in the following challenge -

My Creative Moments - October Wordplay Challenge of 'Anything'.

Thanks for stopping by!

Jocelyn


Card Recipe:

Stamps:  Inkadinkado Silhouettes #97289 (RETIRED), Sentiment - Crafty Kids (now Kaszazz) 113K

Ink:  Kaleidacolor Blue Breeze dye, Versamark Watermark, Stazon Jet Black, Colorbox Chalk Bisque

Designer Paper:  Lili of the Valley (UK) Frosty - 8" x 8" pad

Accessories:  Glossy cardstock, brayer, Perfect Layers Tools, Ruby Red Liquid Pearls, 3/8" or 10mm wide white organza ribbon, Bow Easy, Fray Stop, finger dauber, sponge, Uniball Signo White pen UM-120AC, Alison Ellis Design White Detail embossing powder, Alison Ellis Design Bubble Fizz fine glitter, Anti-Static pad, Big Shot, Lifestyle Nesting circle die, MFT Die-namics Snowflake die (I used the smallest one from the Snowflake Trio set), Ranger Picket Fence Crackle Distress Paint, Kindyglitz Crystalina glitter glue, Kaisercraft light blue rhinestones SB774, dimensionals, heat-gun, fabric glue, Tombow Mono glue

Punches:  EK Success Scalloped Scallops border


Tuesday, October 8, 2013

Cottage Cutz Snow Swept Border Christmas card


Hi blogging friends From Millan.Net


ETA:  I have had a couple of enquiries about the Cuttlebug Kars Snowflakes embossing folder.  I recently discovered that this folder is retired and the chances of finding one is very unlikely.  However, Sizzix has a folder set called Christmas Words and Dots set which is readily available which you could substitute.  Please see this link at Sizzix HERE for more information - and here is a picture of the set:


 ***************************
Today I am sharing a Christmas card using a new Cottage Cutz die which I fell in love with the moment I saw it.  There is such a variety of brands of dies available now that it is just mind-boggling - and there are so many beautiful Christmas ones that I could just go crazy and fill my little online shopping basket to overflowing!  This particular die is called Snow Swept Border and was an early birthday present I bought for myself (I know, I know - ANY excuse LOL!!).


There is not alot to explain about my card really.  The cardstock base was embossed with my Big Shot and Cuttlebug Kars Snowflakes embossing folder (RETIRED).  I popped the diecut up on dimensionals and each layer of the snow has been handcut - plus all these layers are up on dimensionals.

The Merry Christmas sentiment is a die by Elizabeth Dies and was diecut using silver glitter cardstock.  This is also a new die and it cut beautifully in my Big Shot - you just have to be careful not to lose the dot for the "i" like I did:  twice!  I added a silver glitter cardstock bottom border which, if I was making my card again, I would add to the top layer of the handcut snow rather than the cardstock base.  It is a bit hard to see that border in my photo because it is in shadow.

Lastly, I tied on the silver ribbon, added Fray Stop to the cut ends because this ribbon frays terribly, then attached the two silver sequins using Glossy Accents.  Glossy Accents is very handy for gluing on odd shapes.  I have been seeing sequins on quite a few cards around the Internet and I really love them.  My lovely friend Sabrina aka Cook22 - one of the Moderators on Splitcoaststampers put me onto them - thanks Sabrina From Millan.Net  This card is dedicated to you!

Challenges:

I made my card for the following challenges -

The ABC Challenge - W for Words - add a sentiment to your creations

Splitcoaststampers Inspiration Challenge - IC409 - Barnes and Noble - I chose Bing Crosby's White Christmas album as my inspiration for several reasons:  I love white Christmas cards; White Christmas is my favourite Christmas song; and because I live in the Australia, it is summer at Christmas-time and I will only ever dream of a white Christmas (although we have had hail several times on Christmas Day - not quite the same peaceful scene!). 

Thanks for visiting by blog today.

Jocelyn


Card Recipe:

Stamps, Ink and Designer paper:  None

Accessories:  Big Shot, Cottage Cutz Snow Swept Border die #CCE-040, Elizabeth Dies #745 Merry Christmas, Cuttlebug Kars Snowflakes embossing folder (retired), 2 x silver sequins 5mm or approx. 3/16" diameter (Riot Art and Craft), Paper Mill silver ribbon (Riot Art and Craft), Fray Stop (Spotlight), cardstock - Paper Mill white, silver glitter (both from Riot Art and Craft), 1mm dimensionals, Glossy Accents

Related Posts Plugin for WordPress, Blogger...