Showing posts with label Cuttlebug Embossing Folders. Show all posts

Wednesday, July 2, 2025

Paper Tole Rose Thank You Card

 
Hi blogging friends,

This is my third Thank You Card that I've made to thank people for their support following my Mum's passing in June:


I am finding being in my Craft Room and creating is like a healing balm for my soul.  Even though Mum's passing at age 94 wasn't unexpected, it has been difficult because she would go downhill then rally, then go downhill then rally again - but she would just become more and more frail each time.  I have taken comfort in that she passed peacefully in her sleep.  

Challenges:

I am entering my card in the following Challenges - click on the underlined link to take you to the Challenge:

Crafty Catz Weekly Challenge #697 of Anything Goes

The Paper Players - Tic Tac Toe Challenge - PP744 - choose at least 3 elements across, down or diagonally.  I chose Flowers, Diecut and Embossing.


I again decided to use a Paper Tole or Diecut Decouage image by Reddy Creative Cards but did trim the image down a little.  I used 0.5mm Self-Adhesive Doublesided Foam Squares between each layer.  

The designer papers are by Uniquely Creative - Dear Diary - which were released in June this year.  These papers are so exquisitely beautiful - I adore them!

The cardstock layers are Dusty Rose and Sage - and the dark green layer is actually some designer paper called Elation P2607 from Kaisercraft's Peace and Joy Collection which was released about 2019.  I couldn't find the right shade of dark green cardstock in my stash so this fitted the bill perfectly.

The dry embossing across the middle is my old favourite:  Cuttlebug Textile Embossing Folder.  I have used this folder so many times over the years and still love it as much as when I first bought it.

The sentiment is by Kaisercraft - Banksia Rose Collectables - which is a recent release.  It matched so perfectly like it was just "meant to be".  I diecut some Dusty Rose Cardstock using my Big Shot and Spellbinders Petite Scalloped Circle Nestabilities and glued that underneath the sentiment using Tombow Mono Multi Glue.

Both the main image panel and sentiment are popped up on scraps of white cardstock.

I diecut 5 x Dusty Rose Cardstock Hearts using an Impression Obsession die called Heart of Hearts.  This particular die cuts out a myriad of different styles and sizes of hearts which comes in very handy.  I glued four around the main image and one on the sentiment panel.  I added some Wink of Stella Clear Glitter Brush to the hearts which added some subtle sparkle.  

Lastly, I glued on some Pale Green Sparklets using Helmar's 450 Quick Dry Adhesive then attached my card front to a Kaisercraft White Card Base.

Finished size is 5-5/8" x 5-5/8" or 143mm x 143mm.

And now here is a pic of the card inside:


I again used the Uniquely Creative Dear Diary Designer Papers for the main background.  I glued on some flowers and leaves from the Uniquely Creative Dear Diary Creative Cuts but also fussy-cut some flowers and leaves from the papers.

Thanks for visiting my blog today!

Jocelyn


Card Recipe:

Stamps and Ink:  None

Designer Paper:  Uniquely Creative Dear Diary 6" x 6" + 12" x 12" + Creative Cuts, Kaisercraft Peace and Joy - Elation P2607 12" x 12"

Accessories:  Reddy Creative Cards Diecut Decoupage #83873, Kaisercraft Trimmer, Pale Green Sparklets (EBay), 0.5mm Self-Adhesive Doublesided Foam Squares, Big Shot, Cuttlebug Textile Embossing Folder, Wink of Stella Clear Glitter Brush, Tombow Mono Multi Glue, Helmar's 450 Quick Dry Adhesive, Kaisercraft White Square Card Base, Cardstock - Dusty Rose + Sage + Scraps of White

Dies:  Spellbinders Petite Scalloped Circle Nestabilities, Impression Obsession Heart of Hearts DIE052-I


Thursday, March 20, 2025

Stampin' Up Frames and Flowers Just a Note Card #3

 
Hi everyone πŸ˜ƒ

I am on a roll playing with the Stampin' Up Frames and Flowers designer paper and diecuts as this is the 3rd card that I have made so far - and there is still plenty of it leftover!


Today's card is another card for my stash that I can use for any number of different occasions which is why I didn't put a Happy Birthday sentiment on it.

I diecut a white cardstock circle using my Big Shot and Memory Box Pinpoint Circle Frame Die which added the dotted detail just for some interest.  Not sure if this die is still available as I have had it for ages.  I popped this on top of the already diecut wreath.  One thing I really love about this Frames and Flowers set is that the diecut pieces literally just fall out as they are cut very cleanly so you don't need to use scissors to trim anything.

I worked out roughly where the diecut bunch of flowers/leaves and the punched elements were going to go so I knew where to stamp the sentiment.  The sentiment is by Stampin' Up from their Simply Said Stamp Set and was stamped using Versafine Onyx Black.  In a perfect world, I would have stamped the sentiment using Pretty Peacock Ink but I don't have that colour yet.   I popped the diecut bunch of flowers/leaves on dimensionals so I had room to glue the punched elements behind it

I punched some leaves from Stampin' Up Cardstock in the colours - Pretty Peacock, Shaded Spruce and Garden Green - using two Martha Stewart Punches:  Frond and Pine Branch.  I glued them on using Tombow Mono Multi Glue but just the bottom portions so I could bend the foliage up to add more height and texture.

I used an old embossing folder by Cuttlebug called Textile to dry-emboss some Peach Coloured Cardstock from my stash - then snipped the bottom with my scissors to make a banner.  This was then layered onto some designer paper then onto Pretty Peacock Cardstock which was trimmed to 1/8" using my We R Memory Keepers Perfect Layers Guides.

Finishing touches are the Peachy coloured Satin Ribbon from my stash, Kaisercraft Blush Rhinestones for the flower centres and Wink of Stella Clear Glitter Brush for the flowers and the peachy elements on the wreath.

Lastly, I glued the card front to a white card base.

Thanks for stopping by!

Jocelyn


Card Recipe:

Stamps:  Stampin' Up! Simply Said #163756

Ink:  Versafine Onyx Black

Designer Paper:  Stampin' Up! Frames and Flowers including diecuts 

Accessories:  Big Shot, Cuttlebug Textile Embossing Folder (retired), Dimensionals, Tombow Mono Multi Glue, Helmar's 450 Quick Drive Adhesive, Kaisercraft Blush Rhinestones BS716, Peach Satin Ribbon (stash), Scrap of White Cardstock, Stampin' Up! Cardstock - Pretty Peacock + Shaded Spruce + Garden Green, Kaisercraft White Card Base, Wink of Stella Clear Glitter Brush

Punches:  Martha Stewart Frond + Pine Branch

Dies:  Memory Box Pinpoint Circle Frame #99760


Tuesday, February 18, 2025

Penny Black Stuck on You Valentine's Day Card + Essentials by Ellen Bear Hugs Felt Bear

 
Hi everyone 😊

Today I am sharing the Valentine's Day Card that I made for my daughter as well as a little felt Bear that I sewed:


If you have been a regular visitor to my blog, you know that I just adore the Penny Black critters.  They are so fun and easy to colour.  I stamped the cat using Versafine Onyx Black Ink onto Ranger Watercolor Cardstock and coloured him/her using Lyra and Faber-Castell Watercolour pencils + Derwent Inktense pencils and my #4 round paintbrush.  I went over the black lines of the image with a Black Copic .03 Multi-liner to crisp them up after my watercolouring.

I diecut the cat with a Lifestyle Nesting Circles Die and my Big Shot then layered it onto Light Teal Cardstock that I diecut using a My Favorite Things Pierced Circle Stax Die-namics.  The Rose Cardstock was diecut using a Spellbinders Petite Scalloped Small Circles die.  This main panel was popped up on scraps of cardstock.

The Rose Cardstock across the middle was dry-embossed using an old embossing folder by Cuttlebug from a set called 'With Love' which has 5 embossing folders - all borders.  I love to use old supplies from my stash.  I still get such a kick out of using my Cuttlebug embossing folders.  The Swiss Dots folder was the first one that I ever bought and I still use it on a regular basis.  

The sentiment is by TPC Studio - Hugs and Kisses which is long retired.  I bought it from my local scrapbooking store here in Australia many years ago.  I stamped it using Versafine Onyx Black ink onto the same Ranger Watercolor Cardstock then diecut it using a Spellbinders Labels Trio die.   I went around the edges using Versacolor Raspberry Ink as it just needed a little something to match the rest of the card.  I popped the sentiment up on dimensionals.  

The designer papers are by Simple Stories - Love and Adore - from 2016 and therefore long-retired.

The light teal cardstock on the card base was trimmed to 1/16" using my We R Memory Keepers Perfect Layers Guides.  The rose cardstock was trimmed to 1/8".  

I used an EK Success Arrows Border Punch to punch tiny hearts from Rose Cardstock.  They are the leftover punchies after using the punch and look like tiny hearts.  Again, if you are a regular visitor to my blog you will know that I use these leftover punchies all the time for my tiny hearts.  I glued 3 around the image and 2 around the sentiment using Tombow Mono Aqua Glue.  I added Kindyglitz Crystalina Glitter Glue to those hearts as well as the cheeks on the cat and the heart on the envelope.

Lastly, I glued the card front to a White Card Base.  Finished size is 123mm x 123mm or 4-13/16" x 4-13/16".

***************************

I made a cute Felt Bear to go with the card:


Isn't the bear just soooo darned ADORABLE?!!   I used a die from Essentials by Ellen called Bear Hugs and Wool Felt from my stash.  I sewed everything using 3 strands of DMC Stranded Cotton and it was super-easy to put together.  The leaves and flower were diecut using some free dies that came with an order from Sunny Studios and were glued on with Helmar's Fabric Glue.  Here is a close-up:


The eyes and nose are part of the Essentials by Ellen die set and were also glued on using Fabric Glue.  I embroidered the mouth using Black DMC Broder 25 Thread.

I stuffed the bear using Fiber Fill.

I am sure I will be making more of these bears as this die set has a present in the set which you can use for Birthdays or Christmas.

Hope you had a lovely Valentine's Day!  Thanks for visiting my corner of the worldπŸ˜ƒ

Jocelyn


Card Recipe:

Stamps:  Penny Black 'Stuck on You' 30-062 clear set, TPC Studio 'Hugs and Kisses' ST94019 clear set (retired)

Ink:  Versafine Onyx Black, Versacolor Raspberry Pigment #156

Designer Papers:  Simple Stores Love and Adore #7614 6" x 6" pad (from 2016 - retired)

Accessories:  Big Shot, Cuttlebug With Love Embossing Folder 37-1171 (retired), Dimensionals, Scraps of White Cardstock, Rose + Light Teal Cardstock, Ranger Watercolor Cardstock, WRMK Perfect Layers Guides, #4 Round Paintbrush, Lyra + Faber-Castell Watercolour Pencils, Derwent Inktense Pencils, Tombow Mono Multi + Mono Aqua Glue, Kindyglitz Crystaline Glitter Glue, Copic .03 Black Multi-liner

Dies:  Spellbinders Labels Trio S3-147 (retired), Spellbinders Petite Scalloped Small Circles Nestabilities S4-117 (retired), My Favorite Things Pierced Circle Stax (retired), Lifestyle Nesting Circles

Punches:  EK Success Arrows Border

*************************

Felt Bear Recipe:

Accessories:  Wool Felt in various colours, Fiber Fill, DMC Stranded Cotton, DMC Black Broder Cotton, Big Shot, Helmar's Fabric Glue, Sewing Needle

Dies:  Essentials by Ellen - Bear Hugs by Julie - EEDIEJ-097-17, Sunny Studio Flower and Leaf Dies (free with order)


Saturday, December 28, 2024

Memory Box Silent Snowflake Frame and Deer Trio Christmas Card

 
Hi everyone 😊

Here is another white-on-white Christmas Card that I enjoyed making so much:


The dotted dry embossing is an old retired folder called Cuttlebug Kars Snowflake which I have used for many, many years.  Even though it is retired, there are so many snowflake embossing folders available these days that you could easily substitute.   The 3 deer are an old Memory Box Deer Trio die which is still available.  The diecut snowy frame is by Memory Box - Silent Snowflake Frame - which I believe is retired.  

I layered them all together then glued them onto a silver glitter cardstock frame which was trimmed to 1/16" using my We R Memory Keepers Perfect Layers Guides.

The sentiment is from a retired set by My Favorite Things - Starry Christmas.  I stamped it using Versarmark Watermark ink and heat-set it using Ranger Silver Super-fine Embossing Powder.  It was diecut using a Spellbinders Shapeabilities Labels Trio die - the 2nd largest in the set.  This is another set of dies that I use often and have had for well over 10 years.

The silver glitter snowflakes beside the sentiment and above the deer are from my box of diecut and punched snowflakes.  I glued them on using Tombow Mono Multi Glue then added a Franceville 2mm Adhesive Crystal Rhinestone to the centres.

Lastly, I glued the card front to a white card base using Tombow Mono Multi glue leaving a 1/8" border.

Finished size is:  5-13/16" x 4-9/16" or 148mm x 115mm.

Thanks for visiting my blog today.

Jocelyn


Card Recipe:

Stamps:  My Favorite Things Starry Christmas (retired)

Ink:  Versamark Watermark

Designer Paper:  None

Accessories:  Big Shot, Heat-gun, Ranger Silver Super-fine Embossing Powder, Tombow Mono Multi Glue, Franceville 2mm Adhesive Crystal Rhinestones, Provocraft Cuttlebug Kars Snowflake Embossing Folder, Kaisercraft Silver Glitter Cardstock, White Cardstock, White Card Base

Dies:  Snowflakes (various brands), Memory Box Deer Trio #98166, Memory Box Silent Snowflake Frame #99854 (retired), Spellbinders Shapeabilities Labels Trio S3-147 (retired)


Amy Design Cool Square Frame Christmas Card!

 
Hi everyone 😊

Today I am sharing another Christmas Card.  If you have been a regular visitor to my blog over the years, you will know that I love to make white-on-white Christmas Cards where I combine various dies and embossing folders that (hopefully) creates something elegant.  So, here it is:  


Probably the hardest thing is taking a good photo!  

The dotted dry embossing is an old retired folder called Cuttlebug Kars Snowflake which I have used for many, many years.  Even though it is retired, there are so many snowflake embossing folders available these days that you could easily substitute.   The 3 deer are an old Memory Box Deer Trio die which is surprisingly still available.  The diecut snowy frame is by Amy Design - Cool Square Frame - which I bought at a Craft Show a couple of years ago - and is still available in Australia (not sure about overseas).  

I layered them all together then glued them onto a silver glitter cardstock frame which was trimmed to 1/16" using my We R Memory Keepers Perfect Layers Guides.

The sentiment is from a retired set by My Favorite Things - Starry Christmas.  I stamped it using Versarmark Watermark ink and heat-set it using Ranger Silver Super-fine Embossing Powder.  It was diecut using a Spellbinders Shapeabilities Labels Trio die - the 2nd largest in the set.  This is another set of dies that I use often and have had for well over 10 years.

The silver glitter snowflakes beside the sentiment and above the deer are from my box of diecut and punched snowflakes.  I glued them on using Tombow Mono Multi Glue then added a Franceville 2mm Adhesive Crystal Rhinestone to the centres.

Once I had finished the card front, I glued it to a Uniquely Creative Square White Card Base. 

Finished size is 5-11/16" x 5-11/16" or 145mm x 145mm.

Thanks for stopping by!

Jocelyn


Card Recipe:

Stamps:  My Favorite Things Starry Christmas (retired)

Ink:  Versamark Watermark

Designer Paper:  None

Accessories:  Big Shot, Heat-gun, Ranger Silver Super-fine Embossing Powder, Tombow Mono Multi Glue, Franceville 2mm Adhesive Crystal Rhinestones, Provocraft Cuttlebug Kars Snowflake Embossing Folder, Silver Glitter Cardstock, White Cardstock, Uniquely Creative Square White Card Base

Dies:  Snowflakes (various brands), Memory Box Deer Trio #98166, Spellbinders Shapeabilities Labels Trio S3-147 (retired), Amy Design Cool Square Frame ADD10158


Wednesday, August 28, 2024

Stampin' Up Thoughts and Prayers Sympathy Card

 
Hi everyone,

Today I am sharing a Sympathy Card that I made for a lady whose husband recently passed away:


The floral branch is from a retired Stampin' Up set called 'Thoughts and Prayers' and the sentiment is from a retired Stampin' Up set called 'Love and Sympathy'.  I stamped them using Versafine Onyx Black ink using a Stamp Positioning Tool.

I added two score lines above and below the images using a Martha Stewart Mini Scoring Board then dry-embossed the panel using my Big Shot and very well loved (and used) Cuttlebug Textile embossing folder. 

I corner-punched the right-hand corners of this panel using a 3/8" We R Memory Keepers Corner Punch then layered the panel onto a white card base with an 1/8" border.  I corner punched the right-hand corner of the card base using a 1/2" We R Memory Keepers Corner Punch.  Note that the main panel has been popped up a little using scraps of white cardstock.

As finishing touches, I added a 3/8" or 10mm wide White Organza Ribbon Bow which I made with my Bow Easy & glued on using Helmars Fabric Glue - and added a very small Kaisercraft Black Pearl next to the sentiment.

Thanks for stopping by!

Jocelyn


Card Recipe:  

Stamps:  Stampin' Up Love and Sympathy (sentiment) + Thoughts and Prayers (floral branch) - both retired

Ink:  Versafine Onyx Black

Accessories:  Big Shot, Cuttlebug Textile Embossing Folder (ret), Kaisercraft Pearls BR211 Black, 3/8" or 10mm wide White Organza Ribbon, Bow Easy, WRMK Corner Punches, Tombow Mono Multi Glue, Helmar Fabric Glue, Martha Stewart Mini Scoring Board, Stamp Positioning Tool, Cardstock:  White


Sunday, July 7, 2024

Stamperia Brocante Antiques Birthday Card

 
Hi everyone 😊

Today I am sharing a Birthday Card that I made for my daughter's birthday:


I am popping this card into the following Challenges:

Splitcoaststampers - Free for All Friday F4A727 - Feature something that begins with the letter B  (mine is the Bear of course)!

Crafty Catz - Challenge #675 - Anything Goes with Optional Twist of Embellishments (I used the flower and heart sparklets)

I LOVED making this card!  The images in the Stamperia Brocante Antiques release are just sooooo beautiful and when Stamperia recently released this range, I couldn't WAIT to get my hands on it.  I especially love all the teddy bear images because I knitted a teddy bear for my daughter's birthday and it just seemed like a match made in heaven.

The main image was diecut from one of the 12" x 12" papers using a Lifestyle Nesting Circle die and my Big Shot.  I layered the image onto pink and teal designer paper from the same Stamperia range.  The teal paper was diecut using a Lifestyle Nesting Scalloped Circle die.

I punched the bottom designer paper panel using a Martha Stewart Doily Lace Edge Punch then embossed the entire panel with a Cuttlebug Jamara embossing folder which added some lovely texture to the card.  I added the seam binding in two separate elements; the bow itself was made with my Bow Easy.   I added some Fray Stop to the edges of the ribbon because it frays so easily.  I glued on a flower from my stash using Helmar 450 Quick Dry Adhesive then brushed on some Wink of Stella Clear Glitter for some sparkle.  

I ink blended every panel on the card with Antique Linen Distress Ink and my ink blending tool.  I recently purchased some domed foam pads for ink blending and I have found them easier to ink blend than the flat circle pads.  I don't get any harsh lines like I used to.

Note that I added scraps of white cardstock underneath the layers on my card for dimension instead of using dimensionals or self-adhesive foam pads.

The sentiment is from a retired Kaisercraft Miss Betty paper pad which was originally released in February 2018 and is one of my all-time favourite releases.  All Kaisercraft pads have sentiments at the back of their pads which come in very handy.  I layered the sentiment onto some designer paper then added some Wink of Stella to the button.   

Kaisercraft don't have anywhere near the amount of releases or even the range of cardmaking/scrapbooking products like they used to.   I miss their Workshop Magazine, their blog, Design Team samples, co-ordinating products and Beyond the Page.   I used to love going to my nearest Kaisercraft store and immersing myself in the experience.  I knew the Manager and she personally did loads of samples and put together kits - it was wonderful because you felt really inspired and you wanted to buy their products.  I can't understand why they don't at least promote their scrapbooking/cardmaking products to encourage creativity which would generate sales.  It's like it's a forgotten part of their business whilst they are busy promoting handbags, soap and baby toys.  Makes me sad 😒😒  Anyway, I am digressing.......

The hearts on the top RHS are by Kaisercraft (another retired product line) which matched the card perfectly (LOVE it when that happens!).  I glued them on using Helmar 450 glue.  

Once I had finished the card front, I glued it onto a brown cardstock base.

I decorated the card inside:


The sentiment is by Stampin' Up from their Sweet Ice Cream set and was stamped using Versafine Vintage Sepia ink onto cream cardstock then diecut with my Lifestyle Nesting Circle and Scalloped Circle dies.  I added some tiny hearts which are the leftover punchies from my EK Success Arrows Border Punch (if you are a regular visitor to my blog, you know that I have been using these tiny leftover punchies as hearts for a VERY long time!)

All the panels were ink-blended with Antique Linen Distress Ink and all the layers on the card front and inside were trimmed to 1/8" using my We R Memory Keepers Layer Guides.

The '21' was diecut from rose gold metallic cardstock and Lawn Fawn Finley's 123 dies which I have had forever but are still available from Lawn Fawn.  I know the 21 looks a little dark but it is definitely rose gold metallic cardstock.

I made a tag as well:


I handcut a tag from the Stamperia Brocante Antiques designer paper then layered it onto some designer paper then handcut it and ink-blended the tag with Antique Linen Distress Ink.

On the back of the tag, I added a rub-on using the Stamperia Brocante Antiques Rub On set then ink-blended the tag with Antique Linen Distress Ink:

I punched a hole using a 1/4" hole punch then added some fibres from the yarn I used for the hand-knitted teddy bear that I made which you can see here:


The teddy bear is a pattern from a Family Circle Magazine dated June 2021.  I knitted the bear using King Cole Truffle DK yarn in the colour 'Cookie Dough'.  It was the hardest thing I have ever knitted but I am so pleased with how it turned it.  I knitted a scarf in Fisherman's Rib using Moda Vera Starlight 8 ply yarn which I bought from Spotlight.

I really struggled with trying to do the nose with black yarn.  I got it crooked and uneven twice and had to keep pulling it out and was worried I was going to damage the muzzle and maybe put a hole in it - and then I had a brainwave and diecut black felt with a Spellbinders Oval Nestabilities die and glued it on using Helmars Fabric Glue.   I was ever-so-pleased with how it looked.  I just love that you can use dies for more than just cardstock and paper!

Popped in two 8mm Black Safety Eyes and stuffed the bear with Polyester Fibrefill.

We had a lovely birthday celebration and went to a cafe for lunch and to a local RSL for the evening meal then a homemade chocolate cake with chocolate frosting at home. 

Phew!  That was a long blog post!  Thanks for stopping by!

Jocelyn


Card Recipe - Front:

Stamps:  None

Ink:  Ranger Antique Linen Distress Ink

Designer Paper:  Stamperia Brocante Antiques 12" x 12" pad + Backgrounds 8" x 8" pad, Kaisercraft Miss Betty 6-1/2" x 6-1/2" pad (retired)

Accessories:  Big Shot, Cuttlebug Jamara Embossing Folder (retired), Ink Blending Tool and Domed Foam Pads, Paper Flower, Wink of Stella Clear Glitter Brush, Light Teal Seam Binding, Fray Stop, Bow Easy, WRMK Layer Guides, Kaisercraft Trimmer, Kaisercraft Sparklets - Hearts RS420 (retired), Helmar 450 Quick Dry Adhesive + Fabric Glue, Tombow Mono Multi Glue, Cardstock: scraps of white, brown card base

Dies:  Lifestyle Nesting Circles + Nesting Scalloped Circles
 
Punches:  Martha Stewart Doily Lace Edge


Card Recipe - Inside:

Stamps:  Stampin' Up! Sweet Ice Cream #154456

Ink:  Versafine Vintage Sepia, Ranger Antique Linen Distress Ink

Designer Paper:  Stamperia Brocante Antiques 12" x 12" pad + Backgrounds 8" x 8" pad

Accessories:  Big Shot, Ink Blending Tool and Domed Foam Pads, WRMK Layer Guides, Cardstock - cream, rose gold metallic

Dies:  Lifestyle Nesting Circles + Nesting Scalloped Circles, Lawn Fawn Finley's 123s #LF770

Punches:  EK Success Arrows Border


Tag Recipe:

Stamps:  None

Ink:  Ranger Antique Linen Distress Ink

Designer Paper:  Stamperia Brocante Antiques 12" x 12" pad

Accessories:  Tombow Mono Multi Glue, Ink Blending Tool and Domed Foam Pads, 1/4" Hole Punch, Fibres from Knitted Bear, Stamperia Brocante Antiques Rub-On DFLRB76, Cardstock - Cream


Knitted Bear:

Pattern:  Family Circle Magazine - June 2021

Yarn:  King Cole Truffle DK - Cookie Dough, Cleckheaton 5 ply - black (for embroidery), Moda Vera Starlight 8 ply

Needles:  4mm

Accessories:  Sewing up needle, Polyester Fiberfill Stuffing, 8mm Black Safety Eyes, Big Shot, Black Felt

Dies:  Spellbinder Oval Nestabilities

Saturday, April 29, 2023

Stampin' Up Beautiful You 21st Birthday Card and Gift Box

 
Hi everyone 😊

Today I am sharing a card and gift box that I made for my niece's 21st birthday.  My niece had a party in a restaurant which I thought was a great idea when there are alot of people invited.  Much easier to cater for and you don't have to clean up afterwards LOL!  My husband and daughter went along but I didn't due to my never-ending fatigue from long-COVID and I didn't want to be a wet blanket and ask to go home after just an hour of being there.  I was disappointed that I couldn't go but at least people are understanding of how debilitating long-COVID can be.


The main image and sentiment are from a retired set by Stampin' Up called Beautiful You.  I adore this stamp set and one that I will never part with.  I stamped the image using Versafine Onyx Black ink onto Ranger watercolour cardstock and coloured it with Lyra watercolour pencils and a #2 round paintbrush.  I think it took me about 3 minutes to colour it!  I diecut the image using my Big Shot and a Lifestyle Nesting Circle die and layered it onto the peach designer paper then diecut a scalloped circle from the darker blue designer paper.

All the papers are my Mintay - Harmony.  Aren't the colours gorgeous?!  

For the LHS panel, I dry embossed the peach designer paper with a retired Cuttlebug Textile embossing folder.   I have really been enjoying using my embossing folders again.  They kind-of fell out-of-favour for quite a few years but with all the amazing 3D embossing folders now available, they are back on-trend.  The blue designer paper was punched using a Martha Stewart Lace Doily edge punch.  I tied on some peach organza ribbon then threaded some peach/gold twine through a gold heart charm and glued that underneath the organza ribbon using fabric glue.  The twine came in a pack of 6 from KMart.  

The sentiment panel was diecut using a retired Spellbinders Shapeabilities Labels Trio die and popped up on dimensionals.  

The peach diamantes on the top RHS I bought on EBay ages ago.  It was a bulk lot of all sorts of colours.  I glued them on using Helmar 450 glue.

Once I had finished the card front, I glued it onto a white card base using Tombow Mono Multi glue.

I decorated the card inside too.  Please excuse the quality of the image but I took it very late in the afternoon and the light was dreary and no amount of editing seemed to improve it much.  Oh well!


The sentiment is also from the Beautiful You stamp set.  I added a strip of leftover designer paper then added the stickers on the LHS from the Mintay Harmony Cardboard Sticker sheet.  

Here is the gift box:


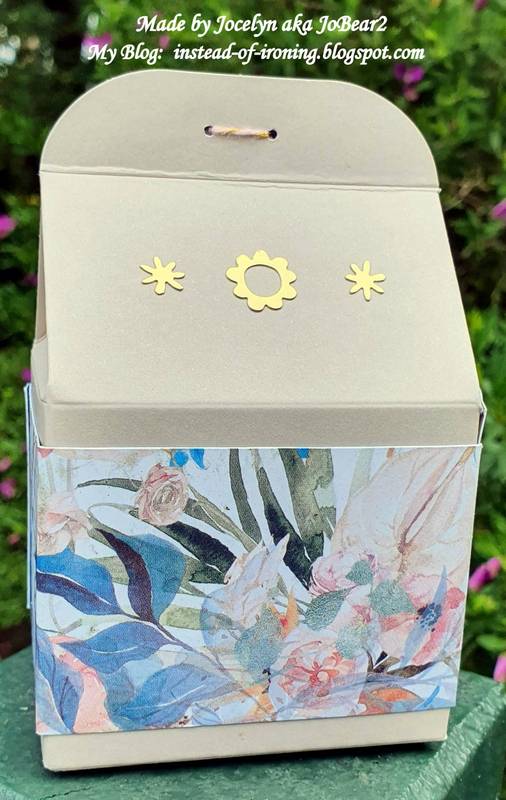
This was a last-minute make so by the time I finished it to photograph it, the light was terrible for photographing.  The box is by Stampin' Up and has been in my stash forever and retired.   I wrapped some designer paper around the box then punched two tiny holes using a retired Stampin' Up 1/16" Hole Punch.  I bought this punch on clearance and it is very handy when you only want a tiny hole in something.  I threaded the peach/gold twine through the holes.  The sentiment is also from the Beautiful You stamp set.  I diecut the sentiment using a Spellbinders Oval Nestabilities die and popped it up on dimensionals.   I ended up stamping the sentiment 3 times after smearing it when I diecut it because I was too impatient to let it dry!  Amazing how you just don't think when you are under time-pressure!   The gold stickers are also from Stampin' Up but long retired.

Here is another photo of the box from the side:


And a photo of the back:  


I popped a pair of earrings in a small organza bag into the box and nestled them in some gold tissue paper.  I bought the earrings from my local Pharmacy which has some beautiful giftware but they didn't come in a box so I had to put my thinking cap on for how to wrap them and to make them look elegant.  I was really pleased with how the box turned out and I love how the box matches the card.

Thanks for stopping by!

Jocelyn


Card Recipe:

Stamps:  Stampin' Up Beautiful You (retired)

Ink:  Versafine Onyx Black

Designer Paper:  Mintay Harmony 6" x 6" paper pad + 12" x 12" papers + Sticker Sheet

Accessories:  Big Shot, Cuttlebug Textile embossing folder (retired), gold heart charm (stash), 1" wide peach organza ribbon (stash), peach/gold twine - KMart, Lyra watercolour pencils, #2 round paintbrush, dimensionals, Helmar 450 glue, Tombow Mono Multi glue, fabric glue, peach diamantes, Wink of Stella clear glitter brush, white card base, Ranger watercolour cardstock

Dies:  Spellbinder Shapeabilities S3-147 Labels Trio (retired), Lifestyle Nesting Circles + Scalloped Circles

Punches:  Martha Stewart Doily Lace Edge


Gift Box Recipe:

Stamps:  Stampin' Up Beautiful You (retired)

Ink:  Versafine Onyx Black

Designer Paper:  Mintay Harmony 6" x 6" paper pad

Accessories:  Stampin' Up Kraft Gift Box (retired), Stampin' Up gold stickers (retired), Stampin' Up 1/16" hole punch (retired), Big Shot, doublesided tape, dimensionals, peach/gold twine - KMart, white cardstock scrap

Dies:  Spellbinder Scalloped Oval Nestabilities