Showing posts with label Cuttlebug. Show all posts

Sunday, January 5, 2025

Maja Design Denim and Friends 21st Birthday Card!

 
Hi everyone,

Today I am sharing a 21st Birthday Card that I made for my Great-Nephew:


It is hard to believe that I am a Great-Aunt to a 21 year old as it makes me sound really old - but then again, my own daughter is 21 so there is a big generation gap.  Doesn't sound as bad when I think about it that way 😉

To make my card, I used a image from a 12" x 12" Denim and Friends designer paper that has all these AWESOME masculine photos perfect for just about any occasion.  All the designer papers on my card are from this same collection.  I have had this collection for a while and you can still get it in Australia - not sure about other countries.

I used a Uniquely Creative Edge Distressing Tool to rough up all the edges of every layer.  I recently bought this tool and I have to say how fantastic it is and alot easier than using the blade of my scissors - and much safer for my fingers!

All the layers are trimmed to either 1/16" or 1/8" using my WRMK Perfect Layers Guides.

The Kraft Cardstock is by Anko which I bought from KMart Australia and matched the card perfectly.

The 21 was diecut from Kraft Cardstock using a very old set of Cuttlebug dies called Baby Face.  These dies are thicker than the usual dies you buy nowadays and I wasn't sure of the sandwich for my Big Shot - so brought out my old and very-loved Cuttlebug and used it instead.  I remember getting my Cuttlebug from my local scrapbooking store after seeing them demonstrate dry-embossing.  I thought it was really amazing to dry-emboss something to add texture to your card.   My first embossing folder was the Swiss Dots and I still use that folder as it just doesn't date.  

I diecut a Navy Blue Cardstock circle using my Big Shot and Lifestyle Nesting Circles die then glued the numbers on top.  I added some Uniquely Creative Twine as it just needed a little something extra.

I glued on the Wooden Happy Birthday and Stars using Helmar's 450 Quick Dry Adhesive then glued the card front to a Cream Card Base using Tombow Mono Multi Glue.

Finished size is 5-7/8" x 4-1/4" or 149mm x 108mm.

Thanks for stopping by!

Jocelyn


Card Recipe:

Stamps and Ink:  None

Designer Paper:  Maja Design Denim and Friends 12" x 12"

Accessories:  Big Shot, Cuttlebug, Uniquely Creative Edge Distressing Tool UCE1986, Uniquely Creative Twine UCE1861, Wooden Stars (stash), Wooden Happy Birthday - Kaisercraft, We R Memory Keepers Perfect Layers Guides, Kraft Cardstock - Anko (KMart), Navy Blue Cardstock, Cream Card Base, Tombow Mono Multi Glue, Helmar's 450 Quick Dry Adhesive

Dies:  Cuttlebug/Provocraft Baby Face Numbers 37-1053, Lifestyle Nesting Circles


Saturday, April 29, 2023

Stampin' Up Beautiful You 21st Birthday Card and Gift Box

 
Hi everyone 😊

Today I am sharing a card and gift box that I made for my niece's 21st birthday.  My niece had a party in a restaurant which I thought was a great idea when there are alot of people invited.  Much easier to cater for and you don't have to clean up afterwards LOL!  My husband and daughter went along but I didn't due to my never-ending fatigue from long-COVID and I didn't want to be a wet blanket and ask to go home after just an hour of being there.  I was disappointed that I couldn't go but at least people are understanding of how debilitating long-COVID can be.


The main image and sentiment are from a retired set by Stampin' Up called Beautiful You.  I adore this stamp set and one that I will never part with.  I stamped the image using Versafine Onyx Black ink onto Ranger watercolour cardstock and coloured it with Lyra watercolour pencils and a #2 round paintbrush.  I think it took me about 3 minutes to colour it!  I diecut the image using my Big Shot and a Lifestyle Nesting Circle die and layered it onto the peach designer paper then diecut a scalloped circle from the darker blue designer paper.

All the papers are my Mintay - Harmony.  Aren't the colours gorgeous?!  

For the LHS panel, I dry embossed the peach designer paper with a retired Cuttlebug Textile embossing folder.   I have really been enjoying using my embossing folders again.  They kind-of fell out-of-favour for quite a few years but with all the amazing 3D embossing folders now available, they are back on-trend.  The blue designer paper was punched using a Martha Stewart Lace Doily edge punch.  I tied on some peach organza ribbon then threaded some peach/gold twine through a gold heart charm and glued that underneath the organza ribbon using fabric glue.  The twine came in a pack of 6 from KMart.  

The sentiment panel was diecut using a retired Spellbinders Shapeabilities Labels Trio die and popped up on dimensionals.  

The peach diamantes on the top RHS I bought on EBay ages ago.  It was a bulk lot of all sorts of colours.  I glued them on using Helmar 450 glue.

Once I had finished the card front, I glued it onto a white card base using Tombow Mono Multi glue.

I decorated the card inside too.  Please excuse the quality of the image but I took it very late in the afternoon and the light was dreary and no amount of editing seemed to improve it much.  Oh well!


The sentiment is also from the Beautiful You stamp set.  I added a strip of leftover designer paper then added the stickers on the LHS from the Mintay Harmony Cardboard Sticker sheet.  

Here is the gift box:


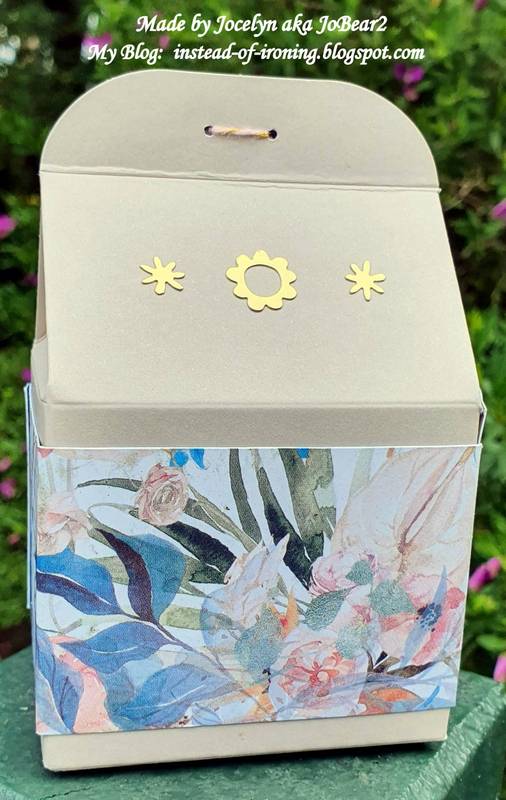
This was a last-minute make so by the time I finished it to photograph it, the light was terrible for photographing.  The box is by Stampin' Up and has been in my stash forever and retired.   I wrapped some designer paper around the box then punched two tiny holes using a retired Stampin' Up 1/16" Hole Punch.  I bought this punch on clearance and it is very handy when you only want a tiny hole in something.  I threaded the peach/gold twine through the holes.  The sentiment is also from the Beautiful You stamp set.  I diecut the sentiment using a Spellbinders Oval Nestabilities die and popped it up on dimensionals.   I ended up stamping the sentiment 3 times after smearing it when I diecut it because I was too impatient to let it dry!  Amazing how you just don't think when you are under time-pressure!   The gold stickers are also from Stampin' Up but long retired.

Here is another photo of the box from the side:


And a photo of the back:  


I popped a pair of earrings in a small organza bag into the box and nestled them in some gold tissue paper.  I bought the earrings from my local Pharmacy which has some beautiful giftware but they didn't come in a box so I had to put my thinking cap on for how to wrap them and to make them look elegant.  I was really pleased with how the box turned out and I love how the box matches the card.

Thanks for stopping by!

Jocelyn


Card Recipe:

Stamps:  Stampin' Up Beautiful You (retired)

Ink:  Versafine Onyx Black

Designer Paper:  Mintay Harmony 6" x 6" paper pad + 12" x 12" papers + Sticker Sheet

Accessories:  Big Shot, Cuttlebug Textile embossing folder (retired), gold heart charm (stash), 1" wide peach organza ribbon (stash), peach/gold twine - KMart, Lyra watercolour pencils, #2 round paintbrush, dimensionals, Helmar 450 glue, Tombow Mono Multi glue, fabric glue, peach diamantes, Wink of Stella clear glitter brush, white card base, Ranger watercolour cardstock

Dies:  Spellbinder Shapeabilities S3-147 Labels Trio (retired), Lifestyle Nesting Circles + Scalloped Circles

Punches:  Martha Stewart Doily Lace Edge


Gift Box Recipe:

Stamps:  Stampin' Up Beautiful You (retired)

Ink:  Versafine Onyx Black

Designer Paper:  Mintay Harmony 6" x 6" paper pad

Accessories:  Stampin' Up Kraft Gift Box (retired), Stampin' Up gold stickers (retired), Stampin' Up 1/16" hole punch (retired), Big Shot, doublesided tape, dimensionals, peach/gold twine - KMart, white cardstock scrap

Dies:  Spellbinder Scalloped Oval Nestabilities


Monday, April 10, 2023

Penny Black Don't Break It Anniversary Card

Hi everyone 😀

It is my husband's and my 34th Wedding Anniversary and this is the card that I made for him.  My husband is easy to make cards for because he doesn't mind cute and cuddly critters so that makes life a little easier.  The Penny Black critters are so timeless and adorable - and I have been using their critters for years and years.


The main image is called 'Don't Break It!' and is wood-mounted - and still readily available.

This is also my card for the following Challenges:

Penny Black Saturday Challenge - April - Anything Goes - Optional of Something Funny

Crafty Catz Weekly Challenge - #632 - Anything Goes - Optional Twist of Something Blue

Splitcoaststampers - Ways to Use It - WT920 - Teddy Bears

I stamped the image using Versafine Onyx Black ink and coloured it with a mix of Jasart Voyager watercolour paints and Faber-Castell watercolour pencils using a #2 round paintbrush.  I added some Glossy Accents to the heart that the teddy bear is holding.   I went over the black lines of the image with a Zig Millenium .005 black pen which had lost some of their blackness from the watercolouring.  The hearts around the image and sentiment are a mix of Sizzix Drifting Hearts Thinlets and leftover punchies from using my EK Success Arrow border punch.  I cut them from some of the designer paper.

The designer papers are really old - from 2012 - and are by Bo Bunny - Love Letters from their 6" x 6" paper pad.  Although you can no longer get them, there are so many Valentine's Day releases that you could substitute.

I diecut the main image using a Lifestyle Nesting Circles die using my Big Shot.  The red circle underneath was diecut from one of the designer papers and the black circle is American Crafts black cardstock.

I added a strip of black cardstock underneath the image and it looked like it needed something so added some dry embossing using a Cuttlebug/Provocraft Love Language embossing folder.

Here is a close-up of that adorable teddy-bear:


The sentiment is by Colorado Craft Company - Lots of Love and was stamped using Versafine Onyx Black ink.  I diecut it using a retired Spellbinder Labels Trio Shapeabilities die S3-147.   I added some more tiny hearts from my EK Success Arrows border punch.  All the hearts were glittered using my Wink of Stella clear glitter brush which adds some subtle sparkle so it is isn't too tizzy for a guy 😉

Both the main panel and sentiment are up on dimensionals.  Once I had finished the card front, I attached it to a white card base.

Thanks for visiting my blog today.

Jocelyn


Card Recipe:

Stamps:  Penny Black 'Don't break it!' 3605F wood-mount, Colorado Craft Company 'Lots of Love' AJ418 clear set

Ink:  Versafine Onyx Black

Designer Paper:  Bo Bunny Love Letters 6" x 6" pad (2012) - retired

Accessories:  Big Shot, Ranger watercolour cardstock, Cuttlebug/Provocraft Love Language embossing folder (retired), dimensionals, Tombow Mono Multi glue, Wink of Stella clear glitter brush, Glossy Accents, Jasart Voyager watercolour discs, Faber-Castell watercolour pencils, #2 round paintbrush, Perfect Layers Tools, Zig Millenium .005 black pen, Stamping Platform, cardstock - American Crafts black, white card base (Anko - K-Mart Australia)

Dies:  Sizzix Drifting Hearts Thinlets #663451A, Spellbinders Labels Trio Shapeabilities S3-147 (retired), Lifestyle/Quickutz Nesting Circles L-CC-001

Punches:  EK Success Arrows border


Tuesday, May 3, 2022

Penny Black Celebrating Thank You Card

 
Hi everyone 😀

Today I am sharing a Thank You Card that I made for our new Vet who has been helping Ruby recover from her illness.  Unfortunately, the correct diagnosis was missed so I am glad that I sought a second opinion. Ruby is slowly gaining weight and certainly brighter in herself and has more of her sassy side back - and enjoying her new Hypoallergenic diet food.   Ruby has a check-up next week so we will see what the Vet says.  Nonetheless, I am being cautiously optimistic.

I didn't have alot of cat stamps that I thought were suitable - and eventually settled on this one:  Penny Black - Celebrating - which is an old wood-mounted stamp.  I thought the balloon would put a smile on his face because, let's face it, who doesn't like a balloon no matter what age or gender you are?!


This is also my card for the following Challenges:

Craftyhazelnut's Patterned Paper Challenge - May - Anything Goes

Crafty Catz - Challenge 593 - Anything Goes with Optional Twist of use your 3 favourite colours 

Critter Crazy Challenge Blog - Challenge #62 - Anything Goes with a Featured Critter 

I stamped the image onto Ranger watercolour cardstock using Versafine Onyx Black ink and coloured it using Lyra watercolour pencils and a #2 round paintbrush.  I went over any of the black lines using a Zig Millenium .03 black pen to darken the lines up again.

I added Glossy Accents to the balloon to add some shine.  The sentiment is by Lili of the Valley which is unmounted rubber that I bought before they went digital.  I diecut some stars from the blue part of the designer paper using my Big Shot and a Memory Box die set - Hearts and Stars - and glued them on using Tombow Mono Aqua glue.   Here is a close-up pic:


The designer paper is old and retired - Kaisercraft Pet's Paradise - and I think was released in 2012.  I bought a stack of it on clearance at a Kaisercraft store.  The dotted cardstock was made using a very old embossing folder - and the first one I ever bought - Cuttlebug Swiss Dots.  I still get such a kick out of embossing cardstock and think that it such a cool thing to be able to do yourself.  All the layers were trimmed to either 1/16" or 1/8" using my Perfect Layers Tools.

The ribbon is from my stash.  I added Fray Stop to the cut ends to stop them from fraying.

I decided to decorate the card inside as I had a strip of the dry-embossed cardstock and the designer paper leftover - so put them to good use.  I also added a diecut blue star to the bottom RHS.  The 'Thank You' came from an assorted pack of sentiments I bought at a Craft Show and just happened to match everything perfectly.


Once I had finished the card front, I glued it to a kraft card base using Tombow Mono Multi glue.

I hope the Vet likes his card.   

Thanks for visiting my blog today.

Jocelyn


Card Recipe:

Stamps:  Penny Black - Celebrating - 1472E - wood mount, Sentiment - Lili of the Valley

Ink:  Versafine Onyx Black

Designer Paper:  Kaisercraft Pet's Paradise - P229 - Pampered Pet - 12" x 12" (retired)

Accessories:  Perfect Layers Tools, Zig Millenium .03 black pen, #2 round paintbrush, Lyra watercolour pencils, Glossy Accents, Big Shot, Cuttlebug Swiss Dots embossing folder, ribbon (stash), Tombow Mono Multi and Mono Aqua glue, Cardstock - Ranger Watercolour, Colormates Deep Creamy Cocoa, scrap of greyish brown, white, kraft card base

Dies:  Memory Box Hearts and Stars #98755 (retired - first released 2014)


Wednesday, December 29, 2021

Lili of the Valley James in the Snow Christmas Card

 
Hi everyone 😀

Today I am sharing a Christmas Card that I made for my daughter.  It was a last-minute make on Christmas Eve as we were away on holidays for the first few weeks of December (finally, after more than 2 years and in and out of Lockdown) so it was wonderful to relax and sit by the river - nothing to think about except what to eat or whether I should have a coffee or not.  I made lots of Christmas cards when I was away - mainly from kits as it is more practical to take them away than taking a pile of craft stuff.  But I was chasing my tail a little when we got back with lots of stuff organise in time for Christmas!  We struggled to get a (real) Christmas tree this year as apparently there was a shortage.  We usually get one from the local Scouts which is a great fundraiser for them but they had a 'sold out' sign when you can usually get a tree right up till just before Santa is heading down the chimney.

This is also my card for following Challenges:

Craftyhazelnut's Christmas - Challenge 574 - Anything Goes with the optional theme of any Christmas or New Year card

Winter Wonderland - End of Year Challenge - Anything Goes Christmas

Please click on the underlined links to go to the Challenges.


The main image I bought many years ago as an unmounted rubber stamp from Lili of Valley UK - but you can get it in digital form from their Etsy Store HERE.

I stamped the image with Versafine Onyx Black ink onto Ranger watercolour cardstock and coloured it with Lyra + Faber-Castell watercolour pencils and a #2 round paintbrush.  I paper-pieced the hat and scarf using some designer paper from an old retired pad - BoBunny Snowfall.   I added some shading with a grey watercolour pencil.  The fluffy stuff on the hat and the snow on the ground is Stampendous Cotton Ball White Fun Flock mixed with Crystalina glitter which was glued on using Tombow Mono Multi glue.

The falling snow around the bear is Nuvo White Blizzard Glitter drops.  It is my first time using them and I love the dimension it gives.  Now, of course, I want to get more colours 😄

I used my Lifestyle Nesting Circle dies and Big Shot for the main image and layers.  The other designer papers are also from a retired pad by Echo Park - Winter Park.

The snowflakes were diecut from aqua glitter cardstock using my Impression Obsession Small Snowflake Set DIE100F.  I added some Kaisercraft Ice Blue Rhinestones to the centres.

The ribbon is from my stash and was attached in two separate elements and the bow itself was tied using my Bow Easy.  The sentiment tag is a die by Cuttlebug - Tiny Tags - 37-1222.  This die set, although retired, has been one of my most-used dies over the years.  The sentiment is by Elzybells (who are no longer in business) from their Mini Messages - Christmas - 20-054 clear set.  I added some tiny Molossi light blue rhinestones underneath.

The burgundy and light blue base cardstock layers were trimmed to 1/8" using my Perfect Layers Tools and the dark teal cardstock was trimmed to 1/16".

Once I had finished the card front, I glued it to a white card base using Tombow Mono Multi glue.  

Thanks for visiting my Blog today!  Happy New Year everyone!

Jocelyn


Card Recipe:

Stamps:  Lili of the Valley (UK) - James Bear in the Snow, Elzybells Mini Messages - Christmas 20-054 clear set (retired)

Ink:  Versafine Onyx Black

Designer Paper:  BoBunny Snowfall Item #6PF927 6" x 6" pad (retired), Echo Park Winter Park Item #WK23023 6" x 6" pad (retired)

Accessories:  Big Shot, Cuttlebug, Ranger watercolour cardstock, ribbon - stash, Bow Easy, Perfect Layers Tools, Stampendous Cotton Ball White Fun Flock, Crystalina glitter, Nuvo White Blizzard Glitter drops, dimensionals, Lyra + Faber-Castell watercolour pencils, #2 round paintbrush, Tombow Mono Multi glue, Kaisercraft Ice Blue SB774 rhinestones, Molossi tiny blue rhinestones, cardstock - aqua glitter, burgundy, light blue, dark teal, white card base

Dies:  Lifestyle Nesting Circles, Impression Obsession Small Snowflake Set DIE100-F, Cuttlebug Tiny Tags 37-1222 (retired)


Wednesday, October 11, 2017

Wellington Bear - Just for you!


Hi everyoneSmiley from Millan.Net 

Thought I would stop in and share a card that I made for my husband:


The adorable teddy bear driving the vintage car is a Topper by Docrafts from their Wellington Bear collection which was released a few years ago.  I have always loved this range for masculine cards and used the range many, many times over the last couple of years.

The designer papers are really old.  I picked them up from my local Kaisercraft Clearance Centre a few years ago and they matched the image perfectly:  love it when that happens :-)  

This card is also my entry for the CraftyHazelnut's Patterned Paper Challenge for October.  The challenge is all about using patterned papers that we have been "saving" and you can enter any creation on which patterned paper/card has been used.  The challenge is open worldwide :-)  Please see this link for more details on the challenge.

All the layers were trimmed to 1/16" using my Perfect Layers Tools.

The grey-brown cardstock on the side panel was dry embossed using my Big Shot and Cuttlebug (Provocraft) Argyle embossing folder which I thought tied in nicely with the design on the ribbon.  I used my old favourite Fiskars Threading Water punch to punch the blue cardstock then tied on the ribbon which came from Riot Art and Craft.  I added Fray Stop to the cut ends of the ribbon because it frays terribly even if you handle it carefully.  The panel was popped up on dimensionals.  The main image panel was also popped up on dimensionals.

The sentiment is also from the Wellington Bear collection and I added two tiny hearts by using my EK Success Arrows border punch (the leftover punchies look like tiny hearts) with some papers in the collection.

I added 3 blue buttons using Crafter's Pick Incredibly Tacky glue after first sewing some matching thread through the buttons (I don't like 'naked' buttons on my cards!).  Lastly, I glued down the card front to a white card base using Tombow Mono Multi glue.

The finished size is 8-1/4" x 3-7/8" or 210mm x 98mm and fits into a standard (Australian) sized business envelope.  It was nice to make a different sized card to the norm.

Thanks for visiting my blog today.

Jocelyn


Card Recipe:

Stamps and Ink:  None

Designer Paper:  Kaisercraft Pets Paradise 12" x 12" (retired)

Accessories:  Docrafts Wellington Bear Topper and Sentiment (retired), Docrafts Mini Buttons - Blueberry Pie x 3, blue sewing thread, Multicraft Imports SR108J blue ribbon (Riot Art and Craft), Fray Stop, dimensionals, Crafter's Pick Incredibly Tacky blue, Tombow Mono Multi glue, Big Shot, Cuttlebug (Provocraft) Argyle embossing folder, Perfect Layers Tools, cardstock: grey-brown, mid-blue, white card base

Punches:  Fiskars Threading Water border, EK Success Arrows border

Monday, July 3, 2017

Elzybells Teddy Surprise birthday card


Hi everyoneSmiley from Millan.Net 

Today I am sharing a birthday card that I made for my daughter using a retired Elzybells stamp set called "Teddy Surprise" - but Penny Black brought out a set using all but one of the images on my card which is called "Wishes and Hugs" PNY-CS-30222 which is fantastic.  I am super-happy that some of the Elzybells images are still available: I still adore them as much as I did when I first started cardmaking years ago 😁  The only image that is missing from the set is my first image ie: just the present. 


This is also my card for the following Challenges:

Cute Card Thursday - Challenge 484 - Anything Goes

Crafty Catz - Challenge 377 - Anything Goes with an Optional Twist of Embossing - dry and/or heat.  I used dry embossing.

Little Red Wagon - Challenge 400 - Three of a Kind - it can be three identical items or three items of a similar kind.  My three items are the 3 images as well as the 3 presents.

I stamped the images using Ranger Archival Jet Black ink onto Ranger Watercolour cardstock and coloured them (other than the presents) using Derwent Inktense pencils + Faber-Castell watercolour pencils and a #2 round paintbrush.  I went around the images with a light blue watercolour pencil and faded the colour out. 

I inked up just the presents then restamped on my designer paper so I could paper-piece the presents.  The paper came from Riot Art and Craft and is by My Memories and I used the flip-side to paper-piece the presents.  I coloured the circles with a dark purple watercolour pencil.  I also re-stamped the bear's paws on image #2 and popped them up on dimensionals so they were higher than the present and looked more realistic.  I went around all the images with a black marker to hide any white lines/my uneven cutting.  Here is a close-up of the 2nd image:


I thought it would be fun to have a "lift-up" panel on the card front as my take on the trendy interactive cards.  The dry embossing is my old favourite Cuttlebug embossing folder called Swiss Dots which I embossed using my Big Shot.  

Lawn Fawn recently came out with a stamp and die set called "Push Here" which has all that you need for when you make interactive cards and want to let the recipient know what to do with their card - so I used the "Open Here" stamp with the half-circle stitched die which you can see in the 1st photo.

I trimmed all the card layers to either 1/16" or 1/8" using my Perfect Layers Tools.  I used my EK Success Arrows border punch to punch tiny little hearts (if you a regular reader of my blog, you know that the leftover punchies look like tiny hearts to me!) and popped them around the 2nd image and the image inside the card.

The inside dry embossing is also an old favourite Cuttlebug folder called Happy Birthday which is still readily available or there are several other brands of similar embossing folders.  

I added the lilac organza ribbon in 2 separate elements and the bow itself was made using my Bow Easy.  I added Fray Stop to the cut ends to stop them from fraying.

Of course, everything got the glitter-treatment from my Stampin' Up Dazzling Details glitter glue:  the circles and bows on the presents, butterflies, tiny hearts, balloons, teddy's cheeks and confetti.  

I went over parts of the images with a Copic black fine multiliner pen to darken some of the black lines especially the eyes, nose and mouth.  Here is a close-up of the inside image:

    
Do you still visit blogs on a regular basis?  With so many online sharing platforms these days such as Instagram, Flickr, Pinterest, Facebook, You-Tube etc., I sometimes wonder how much blogs have perhaps taken a back seat compared to years ago when I first started this blog.  Perhaps people are more interested in seeing the finished product and not necessarily interested in the process of how it was made(?).  I know my viewing habits have changed in the past couple of years and I watch more You-Tube than I do television.  I also love to share my garden/nature/sky/cat photos on Instagram which I joined about 18 months ago.  You just run out of time to look at everything otherwise you would be online 24/7 and never do anything else!  Let me know your thoughts in a comment 😀

Thank you for visiting my blog today! 

Jocelyn


Card Recipe:

Stamps:  Elzybells Teddy Surprise 20-016-CC clear set (retired), Lawn Fawn Push Here 

Ink:  Ranger Archival Jet Black

Designer Paper:  My Memories #169960 (Riot Art and Craft)

Accessories:  Derwent Inktense + Faber Castell watercolour pencils, #2 round paintbrush, Cardstock - lilac, purple, Ranger Watercolour cardstock, Copic fine black multiliner pen, Perfect Layers Tools, Stampin' Up Dazzling Details glitter glue, Cuttlebug (Provocraft) Happy Birthday 37-1133 + Swiss Dots 37-1604 embossing folders, Big Shot, Scor-Pal, dimensionals, Kokuyo Dotliner 8.4mm tape runner, Tombow Mono Multi glue, lilac organza ribbon, Bow Easy, Fray Stop

Dies:  Lawn Fawn Push Here

Punches:  EK Success Arrows border

Saturday, December 31, 2016

Memory Box Dancing Snowflake Frame Christmas card

Hi everyoneSmiley from Millan.Net

Just stopping in to share a few Christmas cards that I made this Christmas season.  I will share them over several blog posts otherwise this blog post would go on forever!  This particular one I finished on Christmas Eve!  I wasn't well from the last week in November so only ended up making a few cards which was very frustrating!

I really love to make white Christmas cards with just a little bit of silver (or another sparkly colour) thrown in:


This card is also my entry for the following Challenges:

Holly Jolly Christmas - Challenge #86 - Create a Christmas Card or Anything but a Card

Splitcoaststampers - Free for All Friday F4A354 - Make your creation snow

Splitcoaststampers - Fan Club December Christmas Challenge - SCSCCDEC16 (note you have to be a paid Fan Club Member to be able to participate)

Onto my card:  the snowflake frame is by Memory Box - Dancing Snowflake Frame.  Once you diecut the cardstock, you then pop it back into your diecutting machine with an embossing pad (and obviously change the sandwich compared to a diecutting sandwich!) and then the frame embosses a few extra elements around the frame.  I don't actually find that it works terribly well even if I add a shim or two but hey, it still looks OK.  If anyone has any recommendations as to how you can make it work better, please let me know!

The deer are also by Memory Box - Deer Trio.  The background dry embossing is an old retired Cuttlebug embossing folder - Kars Snowflake but there are numerous brands of similar embossing folders that you can buy that will do the same job.  I often get emails about where it can be purchased but it would be like finding a needle in a haystack!  I glued all the layers together using Tombow Mono Multi glue then attached the panel to silver glitter cardstock using Ranger Wonder tape which is a strong adhesive and works really well in those situations where regular doublesided tape doesn't adhere very well.  I trimmed the silver glitter cardstock to 1/16" using my Perfect Layers Tools

The sentiment is by My Favorite Things - Starry Christmas - which is a few years old and probably retired too - but again, there are plenty of brands you can substitute.  I prepared my cardstock using a powder tool then stamped the sentiment using Versamark Watermark ink and heat-embossed it using Ranger Superfine silver embossing powder.

I diecut the sentiment using a My Favorite Things Fishtail Flag Stax die.  As I wanted a fishtail at both ends but the die only cuts a fishtail on one end, once I had diecut one end, I simply flipped the die around to diecut the other end so it was a perfect match.

I added a Papermania silver star rhinestone to each end of the sentiment panel then attached the panel using doublesided tape.

I diecut some snowflakes out of silver glitter cardstock using a Poppystamps Valley Snowflakes die set then glued them onto the scene using Tombow Mono Multi glue.  I added a tiny Papermania silver rhinestone to the snowflake centres.

Once I had finished my card front, I attached it to a white card base.

Thanks for visiting my blog today :-)

Jocelyn


Card Recipe:

Stamps:  My Favorite Things Starry Christmas

Ink:  Versamark Watermark

Designer paper:  None

Accessories:  Powder tool, Papermania silver rhinestones set PMA 351103, Ranger Superfine silver embossing powder, heat-gun, Big Shot, Cuttlebug Kars Snowflake embossing folder (retired), Tombow Mono Multi glue, Ranger Wonder tape, Perfect Layers Tools, Cardstock: white, silver glitter

Dies:  Memory Box - Dancing Snowflake Frame #99281 + Deer Trio #98166, My Favorite Things Die-namics Fishtail Flag Stax, Poppystamps Valley Snowflakes #1234

Sunday, September 4, 2016

Wellington Bear Father's Day card


Hi everyoneSmiley from Millan.Net

Today is Father's Day in Australia and this is the card that I made for my husband who is a fantastic Dad to our daughter:


This is also my card for the Craftyhazelnut's Patterned Paper Challenge for September.  The idea of the challenge is to use up your stash of patterned paper because, let's face it, many of us have heaps!  The paper I used on my card is from 2013 but I have plenty that is older than that LOL!  The Challenge is open to anyone no matter where you live in the world, so why not play along?  It is always 'Anything Goes' so that makes it easy. 

The main image is a topper from Docrafts - Wellington Bear.  The kraft and navy blue cardstock layers were trimmed to 1/16" and 1/8" respectively using my Perfect Layers Tools.

The designer papers are from a 6" x 6" paper pad - Authentique - Season's: Winter.  The colours in the pad matched the image to perfection so I don't think it matters that the pad is meant for Winter.

You can't tell from the photo but I ran the designer paper on the panel underneath the main image through my Big Shot using a Cuttlebug Argyle embossing folder.  Just wanted to add some texture for interest.  I punched the navy blue cardstock using a Fiskars Scallop border punch then added the ribbon.  I added Fray Stop to the cut ends to stop them from fraying.

I glued on a navy blue heart button from my stash using Crafter's Pick Incredibly Tacky glue.  I sewed some navy blue thread through the button holes as I don't like 'naked' buttons on my cards - they don't look finished to me :-)

Once I finished my card front, I glued it to a white cardstock base using Tombow Mono Multi glue as it gives you some time to make sure everything is straight before it sticks.  Finished size is 5-1/2" x 5-1/2" or 14cm x 14cm and it is a top-opening card.

We have just had a lovely and quiet day at home to celebrate Father's Day.  The weather has been dreary this afternoon so we lit the fire, made a vanilla butter cake for afternoon tea and are having a roast for dinner.  Perfect!

Thanks for stopping by!

Jocelyn


Card Recipe:

Stamps and Ink:  None

Designer Paper:  Authentique Seasons - Winter #SEA017 (from 2013)

Accessories:  Docrafts © Hallmark Wellington Bear topper, Perfect Layers Tools, Stampin' Up Fuse Fast adhesive, Crafter's Pick Incredibly Tacky glue, Tombow Mono Multi glue, navy blue heart button (stash), navy blue sewing thread, Big Shot, Cuttlebug Argyle embossing folder, cardstock - kraft, navy blue, white card base

Punches:  Fiskars Scallop border

Monday, August 29, 2016

Lili of the Valley - Jenny Bear Friendship card

Hi everyoneSmiley from Millan.Net

I think it's lovely idea to surprise someone with a card when it isn't for a specific occasion such as a birthday - and the card I am sharing today was for a very special lady who lives on the other side of Australia just to let her know how loved she is by our family.  Now that C has the card, I can share it here on my blog:


This card is also for the Craftyhazelnut's Patterned Paper Challenge for August.  Please see THIS LINK for the challenge details.

The main image is from a Lili of the Valley (UK) Art Pad called 'James and Jenny Bear' Set 23 - and the designer papers are also by LOTV - Always and Forever - all of which LOTV retired a little while ago :-(  The papers were designed by NitWit Collections for LOTV and you can buy and download them here at NitWit's website - see THIS link.

I diecut the main image using my Big Shot and Lifestyle Nesting Circle dies.  The sentiment is also by LOTV and was stamped using Ranger Archival Sepia ink.  I coloured in the flowers on the sentiment using a pink pencil then added some tiny pink Molossi rhinestones to the flower centres.  I popped the panel up on dimensionals.

The bottom panel cardstock was punched using a Martha Stewart Lace Doily Edge punch.  The lacey top-left corner is a die by Cuttlebug - Vintage Corner - which I diecut using my Cuttlebug from the designer paper.  I diecut multiple layers of pale pink cardstock and glued them together then glued the designer paper on top so the diecut had some depth then added some Kaisercraft pink rhinestones to the top right and bottom left corners.

The pink seam binding was added in two separate elements and the bow was made using my Bow Easy and attached with Fabric glue.  The heart button was glued on using Crafter's Pick Incredibly tacky glue.  I added Fray Stop to the cut ends to stop them from fraying.

The layers were trimmed to 1/8" using my Perfect Layers Tools.  I using an EK Success Arrows border punch to punch some tiny hearts (the leftover punchies look like tiny hearts) from dusky pink cardstock and added one to the sentiment panel and dotted the rest around the teddy bear.  I added plenty of Stampin' Up Dazzling Details glitter glue to the tiny hearts, bunch of flowers and the tag and the teddy's bow.  Here is a close-up:


Once I finished the card front, I glued it to a white card base.

I decorated the card inside to match the card front:


The sentiment is by Mama Elephant from their Woodland Gifts set.

Thanks for stopping by!

Jocelyn


Card Recipe:

Stamps:  LOTV Circular Sentiments Set 7, Mama Elephant Woodland Gifts clear set

Ink:  Ranger Archival Sepia

Designer Paper:  LOTV 'Always and Forever' 8" x 8" pad © NitWit Collections

Accessories:  Main image - LOTV James and Jenny Bear Set 23 Art pad, Big Shot, Cuttlebug, Perfect Layers Tools, pink heart buttons - Dress It Up, pink sewing thread, SU Dazzling Details glitter glue, SU Fuse Fast adhesive, Crafter's Pick Incredibly tacky glue, fabric glue, Molossi and Kaisercraft pink rhinestones, pink pencil, dimensionals, pink seam binding, Bow Easy, Fray Stop, cardstock - dark dusky pink, pale pink, white, brown, white card base

Dies:  Lifestyle Nesting Circles, Cuttlebug Vintage corner (retired)

Punches:  Martha Stewart Lace Doily edge, EK Success Arrows border