Showing posts with label Craft Concepts embossing folders. Show all posts

Friday, October 2, 2015

Clean and Simple Wedding Card


Hi blogging friendsSmiley from Millan.Net

It feels good to be able to play in my Craft Room a bit more - and today I am sharing a Wedding Card:


This is also my entry for the following challenges:

Papertake Weekly Challenge - Take your pick - the last challenge of every month has several themes and you simply take your pick from them.  There’s a sketch, a colour theme, a product theme and a technique theme to choose from. I chose the Technique Theme which is:   Embossing either heat, dry or simply embossing a die or using an embossing folder.  I used heat embossing and dry embossing on my card.

Simon Says Stamp Wednesday Challenge - Anything Goes - they are showcasing Clearly Besotted Products this week but you don’t have to use them to join in, however, if you have some, they would love to see them used.  I didn't use those products.

Splitcoaststampers - Clean and Simple CAS310 Challenge - Love is in the Air - which is from February but there are no time limits to play SCS Challenges.

Anyway, on to my card........

I love to use embossing folders to make wedding cards and used one of my all-time favourite folders by Craft Concepts - Budding Vine.  So pretty, don't you think?!  Once I worked out whereabouts on the card I was going to put my cord, I made two pencil lines about 1/2" apart so that I knew exactly where to do the dry embossing, then used my Martha Stewart Score Board to score a line right underneath and above the dry embossing.  I really love how the score line just "finishes" the dry embossing edge.

I used a Corner Chomper on the 1/2" setting to round the bottom corners then tied on the silver cord which came from my local supermarket last Christmas.  I added Fray Stop to the cut ends to stop them from fraying and added a dot of Super Glue to the knot to stop the cord from coming undone.  I attached the dry embossed panel to a top-opening white cardstock base by using lots of doublesided tape and a bit of Tombow Mono Multi glue (less surface area from the dry embossing = need more adhesive!) then trimmed the bottom and side edges to 1/16" using my Perfect Layers Tools.  I  rounded the bottom corners using the same 1/2" setting on the Corner Chomper. 

The sentiment panel was diecut using a Spellbinders Nestabilities Floral Ovals die (I used the 2nd largest die).  The sentiment is from a Simon Says Stamp set - Sending and Wishing and was stamped using Versamark Watermark ink and heat-set using Ranger Silver Superfine embossing powder.  I attached the sentiment panel using dimensionals.

Lastly, I punched a heart from pink glitter cardstock using a Carl CP-1 Heart punch.  Initially, I had punched a red glitter cardstock heart but decided to go for a softer look by using the pink instead. 

Finished size is 5 inches x 5 inches or 127mm x 127mm.

Thanks for visiting my blog today!

Jocelyn


Card Recipe:

Stamps:  Simon Says Stamp Sending and Wishing SSS101475 clear set

Ink:  Versamark Watermark

Designer Paper:  None

Dies:  Spellbinder Floral Oval Nestabilities S4-356

Accessories:  Big Shot, Martha Stewart Score Board, Craft Concepts Budding Vine embossing folder, silver cord - Woolworths Christmas Collection, Fray Stop, We R Memory Keepers 1/2" Corner Chomper, Super glue, Tombow Mono Multi glue, doublesided tape, dimensionals, Ranger Superfine Silver embossing powder SFJ18292, heat-gun, cardstock - white, pale pink glitter

Punches:  Carl CP-1 Heart

Monday, September 12, 2011

Penny Black: Butterfly Bear Birthday card


Hi blogging friends Free Smiley Courtesy of www.millan.net    

I made a birthday card for my Godfather's partner who is a bright, bubbly and happy lady who means the world to me.  As this particular lady loves bright colours, I went for a bright lilac colour which I know she will love.

The background designer paper was a rather plain looking lilac sheet from my Prima 'Sweet Fairy' 6" x 6" pad so I decided to jazz it up a little by stamping all over it with a little butterfly stamp from the Penny Black set 'Garden Friends'.  I stamped it using Versacolor Lilac pigment ink as well as Versamagic Pretty Petunia chalk ink (the Pretty Petunia colour is the darker purple shade that you can see if you peer closely!).

Then I grabbed a flower from my Penny Black set 'Wonderful' and stamped that all over with Elzybells Sugar Candy (white) pigment ink. I then heat-set the paper to dry off the pigment ink otherwise it would have smeared.   The effect of the stamping is very subtle but made the designer paper look a little more interesting than just using it as it was.  Of course, much of it is covered by all the other stuff on the card now - but it was really an experiment at seeing what I could do with a plain sheet and it was fun to play around.

The teddy (also a Penny Black stamp) was stamped onto watercolour paper using Versafine Onyx black ink and coloured with watercolour pencils and a paintbrush.  I added some Kindyglitz Crystalina to the butterflies which you might be able to see in this wee close-up (note you can click on it if you want a bigger piccy).  This image panel is also up on dimensionals.


The side panel was embossed with my Craft Concepts - Budding Vine embossing folder and the gorgeous border punch is a Martha Stewart edge punch called 'Vintage Floral'.  Isn't it fab?!!  The white lace is over 30 years old which I inherited from my parent's wool and haberdashery store.  I should use more lace on cards - I really love how it looks.  It was sheer luck that the Lilac Twine matched the card perfectly.  Usually I choose my ribbon when I pick my cardstock colour so that I am not left with a card and no matching ribbon which makes me crazy!  I love it when everything you find just seems to match perfectly.

I diecut a tag and stamped the sentiment which is from the Penny Black 'Critter Party' clear set.  I added two tiny hearts which are the leftover punches from using my EK Success Arrows border punch - the punchies look like tiny hearts to me.  I added some Kindyglitz to them as well.

The paper flowers are from Enthaily Wholesale (an Aussie company) and the dark green foliage was made using a Martha Stewart Branch punch.  I did actually remove the green base from underneath the flowers because the green didn't match my card (it was too yellowy-green) so I punched some stars with a Carl CP1 Star punch using the same dark green cardstock as for the foliage and simply glued them underneath the flowers.  I attached the foliage and flowers with Crafter's Pick Incredibly Tacky glue (LOVE this stuff!).

Lastly I glued on some heart-shaped buttons.

Challenges:

I am entering my card into the following challenges -

Makin' it Colourful - Challenge #34 - Make it purple

PaperPlay Challenges - Week 36 - use 2 or more stamped images.  I have used the teddy stamp plus the other 2 stamps (butterfly and flower) to make the background designer paper.

*************************

On a completely different topic, I have stepped down from the Fat Cat's Design Team which I have been part of for about a year.  Thanks to Kaaren (the owner) for having me - it's been a fab experience and I have learned so much!  Of course, I will still be blogging and cardmaking - nothing will change in that regard.  In fact, here is a little sneaky peak of part of a project I have been working on........hmmmmm.....I wonder what it might be.........


*************************

As always, if you have any questions, please don't hesitate to email me.  You will find my email address on the LH sidebar of my blog - just scroll down till you see the little smiley face.  Or just leave a comment below and I will update this post if need be.  Thanks so much for stopping by Free Smiley Courtesy of www.millan.net

Jocelyn


Card Recipe:

Stamps:  Penny Black clear sets - 'Make a wish' sentiment from Critter Party 30-013, 'Flower' from Wonderful 30-029 and 'Butterfly' from Garden Friends 30-021, Penny black wood-mounted 'Butterfly Bear' 3696H

Ink:  Versafine Onyx black, Versamagic Pretty Petunia chalk, Versacolor Lilac pigment, Elzybells Sugar Candy (white) pigment ink (no longer available)

Designer paper:  Prima Sweet Fairy 6" x 6" pad

Accessories:  Cuttlebug, Cuttlebug Tiny Tags dies, Craft Concepts Budding Vine embossing folder, Spellbinder Labels 12 nestabilities, Kindyglitz Crystalina, paper flowers - Enthaily Wholesale, lilac twine - The Twinery,  lace - stash, 140lb Watercolour paper, Faber-Castell and Derwent Inktense watercolour pencils, paintbrush, Crafter's Pick Incredibly Tacky glue, heart buttons - Spotlight, dimensionals, heat-gun, Cardstock:  lilac, lavender, forest green

Punches:  Martha Stewart Vintage Floral edge, EK Success Arrows border, Martha Stewart branch, Carl CP-1 Star

Wednesday, April 13, 2011

Penny Black: Egg hunting Easter card for my daughter


Hi there!  

Sorry it's been a while since I posted.  Had alot on my plate last week and now it's school holidays so my posting is likely to be a bit sporadic for the next few weeks.

I always make my DD an Easter Card and of course, being young, she still believes in the Easter Bunny which makes it a fun time for all of us. 


The current Inspiration Challenge IC279 over at Splitcoaststampers is Cox and Cox and I chose a pink elephant as the inspiration behind my card.  I loved the colours so I searched through my stash to find some designer paper with those colours and went from there.

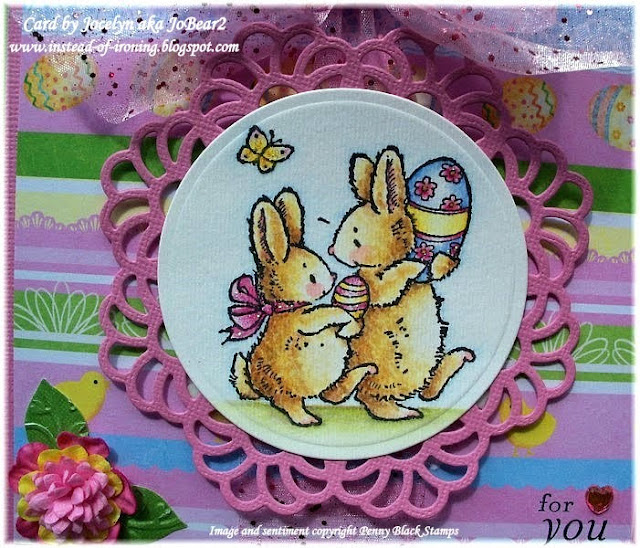
The bunnies were stamped onto Watercolour paper and coloured with watercolour pencils.  I added some Kindyglitz to the easter eggs, the bunny's bow and the butterfly.  The gorgeous lacey pink diecut was made with a die by My Favorite Things which runs through the Cuttlebug using the same sandwich as for Spellbinder Nestabilities.  Oh, I love this die so much!!  Here is a little closeup of the image:  


The main image is up on 1mm mounts (dimensionals).  The gorgeous sparkly pink ribbon came from my local Kenny's Cardiology store which was having a closing down sale.  I will be sad to see them go as I have been a frequent visitor.

The flowers are from my stash - although the yellow flower was originally white and I coloured it with a yellow Bic Mark-It.  The leaves were handcut and I ran them through my Cuttlebug using the Budding Vine embossing folder just to add some texture.  Here is a little close-up:


Challenges:

CCEE Stampers Challenge CCEE1114 where they want you to use a doily die or lace on your project (or both).

On a totally different topic, I have been trying my hand at dying my own seam binding ribbons and making my own flowers so I hope to upload some photos and deets very soon.  Watch this space!!

Thanks for stopping by to have a peek at my card!

Jocelyn


Card Recipe:

Stamps:  Penny Black 'Egg Hunting' PB-1935-F, Sentiment - Penny Black from 'Tiny Wishes' clear set PB-30-026

Ink:  Versafine Onyx black

Designer paper:  My Memories 149207 - Riot Art and Craft

Accessories:  Cuttlebug, My Favorite Things Die-namics Decorative Doily Die, Spellbinder Circle nestabilities, Craft Concepts Budding Vine embossing folder, flowers from stash, pink Bic Mark-It, pink heart gem, ribbon - Kenny's Cardiology, Bow Easy, 1mm mounts (dimensionals), 140lb cold-pressed watercolour paper, Faber Castell watercolour pencils - Riot Art and Craft, paint brush, Kindyglitz crystalina, Cardstock: pink, green

Saturday, March 26, 2011

Penny Black: You are the Bestest - birthday card


Hi blogging friends :-)

After having had a very busy week this week, I finally was able to turn one of my watercoloured images into a card.  This card will be going to my SIL for her birthday next week:


In case you missed by last post, I have been learning how to use watercolour pencils and really loving it and found it very relaxing to just sit and colour while I watched TV.  I saw some videos by Bob Davies on You-Tube on how to use watercolour pencils and found his tutorials very helpful.  He has videos of other mediums too eg: acrylics and oil painting etc.  Now that I have finally worked out how to embed a You-Tube video on my Blog, you can find Part 1 of his Watercolour pencil tutorials here:


I used Faber-Castell watercolour pencils which I bought from Riot Art and Craft about 6 months ago, and they weren't expensive, yet their colours are beautiful and vibrant.  They are my new favourite toy LOL!!!

There really isn't a whole lot to explain about my card.  The bottom panel was run through my Cuttlebug using my Budding Vine embossing folder (which is now largely hidden by the ribbon!) - oh well!  I attached the beautiful silk ribbon in 2 separate elements, and the bow itself was made with my Bow Easy.  I made a button using my designer paper and Epiphany Button Studio tool and sewed this to the centre of the bow.  And the main image panel is up on mounts.

Here is a close-up photo of the image and the colours look more true-to-life in this close-up - they are little washed-out in the first photo:


Challenges:

The 2nd Challenge is the Splitcoaststampers - Free for All Friday F4A56 Challenge of "How does your Garden grow?" - what makes you think of a garden and happy springtime?  I have lots of daffodils in my garden that start flowering very early in spring and they always seem to chase away my winter blues.

Thanks for stopping by!  Have a fab weekend!

Jocelyn


Card Recipe:

Stamps:  Penny Black "You're the Bestest" 40-015, Sentiment by Penny Black from "In the Garden" 30-044 clear set

Ink:  Versafine Onyx Black

Designer paper:  Fancy Pants Pure Item #823 (from 2007) - retired

Accessories:  Cuttlebug, Budding Vine embossing folder - Craft Concepts, Spellbinder Labels 1 Nestabilities, 1mm mounts (dimensionals), Pearls - BR207 Yellow - Basics by Kaisercraft, 14mm Epiphany Button Studio Tool and 14mm button blank, Bow Easy, 1" - 2.5cm wide Burgundy silk ribbon, Faber-Castell Watercolour pencils (set of 48), small round paint-brush, 225gsm Watercolour paper, Cardstock:  light mustard, rusty burgundy

Punches:  Martha Stewart Pinking Scallop

Saturday, January 29, 2011

Wedding Cards using LOTS of embossing folders!


Hi and thanks for stopping by!  

Sorry I haven't blogged for a little while - some frustrating computer issues plus being school holidays here in Australia, I've been out and about quite alot (been to the beach - yay!) and had no uninterrupted "me" time.

Anyway..........I have been playing with my embossing folders as the Challenge #4 over at CropStop is  "Make a Good Impression" where you have to use 2 different patterns as embossing on your project.  I had had my eye on the Splitcoaststampers 'Free for All' F4A47 Challenge  of "Texturize me!" from about 2 weeks ago and you had to use 2 different embossing folders for a card for that challenge - but I never got a chance to play.  Thought it was a cool idea though (you know how much I LOVE my Cuttlebug!!).


ETA:  I just learned that the above card was picked as one of the Cream of the Crop cards from the challenge over at Crop Stop - and I get a special blinkie to add to my Blog.  How lovely!!  Thanks Crop Stop!  Woo Hoo!!

So while I was at it, I decided to combine it with the SCS Clean and Simple Challenge CAS103 of "Flourishes" and pop these cards into the SCS Fan Club January Challenge of "Love".  I can't give you any more details about the Fan Club Challenge as you have to be (paid) Fan Club Member of SCS - I am only allowed to reveal the "theme". 

For the card above, I embossed 2 separate pieces of cardstock:  one with the hearts embossing folder and the other with the Budding Vine folder (note I did have to run the hearts-embossed cardstock through my Cuttlebug twice so I could get the pattern on the cardstock to the width I wanted - I hope that makes sense!!).  I then trimmed the 2 pieces of cardstock down so that when I put them together, the hearts-embossed cardstock was about half the height of the Budding Vine-embossed cardstock - there was a slight overlay so that I could tape them together easily at the back.   To hide the join at the front, I glued a piece of white lace over the top.  That piece of lace is old shop stock from a Haberdashery business my parents ran in the 1970's - so is over 30 years old!  The embossed panels are up on foam tape so there is a bit of height between them and the cardstock base.

Then, because the CAS Challenge was "Flourishes", I decided to stamp the sentiment onto one of my Spellbinder Fancy Tags die (I thought it looked pretty "flourishy" to me!), and then diecut the 2 Vintage corners from my Vintage Die set as some "bonus" flourishes and popped all of these up on mounts.  After I stuck the Vintage corners on, I then thought maybe it looked "too much", but they ain't comin' off now 'cos it will rip the cardstock!  Oh well!  I punched a heart from some glittery red cardstock which I bought when I went to Bright on holidays last year - cool stuff if you can get it as the glitter is very well adhered and doesn't come off and make a glittery mess!! 

And here is the 2nd version which is also for the Fan Club Challenge:


For this version, I used the Lace Doily edge punch instead of the piece of lace, and added 2 ribbons:  the black/gold one with the red-sequin one over the top.  I also used 2 different embossing folders:  Textile and Swiss Dots, and added the black cardstock layer on the top of the white base.  I omitted the Vintage die corners as it just looked "too busy".  Note sure if you can see, but there is a Scor-Pal line above the punched border which made it easier to butt it up underneath the Textile embossing so as it would be straight.  Here is a close-up piccy of the 2 ribbons - the red sequined and gold/black ribbon is true to life as to what the colours are - the main photo doesn't show it very well :-(  I can tell you that it was sooooooo hard to take photos of (both) the cards to try and capture the red sparkle but not have the embossing look all washed out:


So there it is.  Go and have a play with your embossing folders and see what different combinations you can come up with - and then try adding in some different punched borders or lace or ribbon.   Once I worked out the design and what embossing folders I liked together, the cards were very quick to make.

Thanks again for visiting!

Jocelyn


Card Recipe:  

Card #1:

Stamps:  Sentiment from Stamp-It Australia set siset014 self-cling rubber (this is a large set of 13 different sentiments)

Ink:  Stazon Jet Black

Accessories:  Cuttlebug, Craft Concepts Budding Vine embossing folder, Hearts embossing folder from Cuttlebug emboss and die set "Love Language", Spellbinder Shapeabilities S4-235 Fancy Tags, Cuttlebug Vintage die set - fancy corner, white cotton lace, 1mm mounts (dimensionals), foam tape, cardstock:  white, red glittery

Punches:  Carl CP-8 heart duo, Stampin' Up corner

Card #2:

Stamps and Ink:  as above

Accessories:  Cuttlebug, Textile and Swiss dots embossing folders, Spellbinder Shapeabilities S4-235 Fancy Tags, 1mm mounts (dimensionals), Scor-Pal, Ribbon: gold/black, red sequin, cardstock: white, black, red glittery

Punches:  Carl CP-8 heart duo, Stampin' Up corner, Martha Stewart Lace Doily edge

Friday, January 14, 2011

CAS Birthday card using Craft Concepts Budding Vine embossing folder


Hi and welcome to my Blog :-)

My BIL's sister recently turned 70 and this is the quick and simple birthday card I made for her.   The beautiful embossing folder is called Budding Vine" by Craft Concepts - I really LOVE this folder - one of my favs - but honestly, if you didn't have this folder, you could use lots of other ones, eg: Craft Concepts Cottage Floral, Cuttlebug Textile or Jamara etc, Crafts Too Damask, or there are some lovely similar ones by other manufacturers.


Once I embossed the pink cardstock, I then cut the pink cardstock card base to size.  I have found by experience, particularly when you use a folder that is very detailed, that it "shrinks" the cardstock, so that if you had it just the right size for your base, it won't be anymore!!   I popped the embossed panel up on foam tape as I wanted a little bit of dimension.

I added the ribbon in 2 separate elements and the bow itself was made with my Bow Easy.  The sentiment panel was diecut with my Oval Nesties, and the sentiment itself was stamped with Dusty Plum pigment ink and heat-embossed with Satin Pearl clear embossing powder which I really love for my heat-embossing - it doesn't turned out as "shiny or glossy" as regular clear embossing powder.  I ran my ink pad around the edges of the panel and popped the panel up on 2mm mounts (dimensionals).

Lastly, I added the 3 pink rhinestones.

I do not know who made the sentiment - it has a number on it, but no Company name.  I tried Googling it, but came up with nothing - I suspect it might be an Australian stamp manufacturer - it's been in my stash since dinosaurs roamed the earth - I forgot I had it, but I love how "swirly" it is and ties in with the Budding Vine embossing folder!   If you do know the stamp manufacturer, please leave me a comment and I will update my post.

And here is the same card which uses Bazzill Bling "Icy Teal" cardstock (not sure of the actual cardstock name - it's just what I call it!).  And of course, I changed the pearls on the sentiment panel to Bliss SB718 and the ink I used for the sentiment was Versacolor Laurel Leaf pigment.  I made this card for my sister-in-laws 60th birthday.  The Bazzill Bling cardstock looks so sparkly IRL - but I think you can see some of the "sparkle" from the photo:


Thanks again for stopping by!

Jocelyn


Card #1 Recipe:

Stamps:  Best Wishes E238 (unknown brand name)

Ink:  Colorbox Dusty Plum pigment

Accessories:  Cuttlebug, Spellbinder Oval Nestabilities, Craft Concepts Budding Vine embossing folder, Bow Easy, pink organza ribbon, satin pearl clear embossing powder, heat-gun, foam tape, 2mm mounts, Kaiser pink rhinestones SB701, cardstock: pink, white

Card #2 Recipe:

Stamps:  Best Wishes E238 (unknown brand name)

Ink:  Versacolor Laurel Leaf pigment

Accessories:  Cuttlebug, Spellbinder Oval Nestabilities, Craft Concepts Budding Vine embossing folder, Bow Easy, pale teal organza ribbon, satin pearl clear embossing powder, heat-gun, foam tape, 2mm mounts, Kaiser Bliss SB718 Pearls, cardstock: white, Bazzill Bling Icy Teal

Tuesday, November 2, 2010

CAS Matchbook Sympathy card using Craft Concepts Budding Vine embossing folder


Hi and welcome to my Blog :-)

Over at Splitcoaststampers, this week's Clean and Simple Challenge CAS91 is 'With Sympathy', so I set to work to make a simple card to have on hand.  This card came together so quickly and easily - I love it when that happens!  

Recently, when I was at my local Riot Art and Craft shop (Aussie store), I found these blank white Matchbook cards (they are A2 size and come in a pack of 8) and thought they looked nice.  Of course, you can make your own.  I couldn't find a tutorial on SCS or by Googling it so perhaps it is called something else in the USA (?).  Anyway, I think by the extra photo of the opened card, you could see how to make your own plus I added some directions/measurements below.  Note that this card already came with the scalloped edge on the LH flap.


I embossed the RH flap of the card with my gorgeous Craft Concepts Budding Vine embossing folder (LOVE this folder!) and the LH flap was embossed with one of the narrow folders from the Cuttlebug 'With Love' set.

The ribbon actually ties around the card, and you slip it off to open the card.  I diecut the tag using one of the tags from the Spellbinder Ribbon Tags Trio, then threaded the ribbon thru and tied it at the back of the card.  I made a bow with my Bow Easy and glued this to the ribbon but made sure I didn't touch the cardstock in the process otherwise the ribbon/sentiment wouldn't slip off the card - the bow is meant to look like it is around the daisy stems.

I punched two tiny hearts using my EK Success Arrows border punch (the leftover punchies when you use the punch look like tiny hearts) and glued them to each side of the sentiment.  Lastly, I added some fine white glitter to these hearts plus the centres of the daisy flowers on the LH panel.  This is a really white glitter - it doesn't have the blue/pinky tones that some white glitters have - and I prefer my really white one for Sympathy cards to give an understated look.

Here is a photo of what the card looks like when you slide the ribbon off:


The inside of the card simply says "With Sympathy".

And here is a close-up of the sentiment panel so you can see the tiny white-glittered hearts:


For your info if you were going to make your own Matchbook card from scratch:  

* the LH flap is 1-1/2" wide
* the RH flap (which tucks under the LH flap a little) is 4-1/4" wide
* the card bottom (base) is 5-1/2" wide
* the height of the card is 4-1/4"

Take a sheet of cardstock 11-1/4" long (x 4-1/4" wide), and use your Imperial Scor Pal/Scoring Board to score lines at 1-1/2" (which will be the LH flap) and 7" (which will be the RH flap).  

Don't forget that if you are going to use a border punch on the LH flap, you would need to add extra width to that flap so that once you have punched your border, the RH flap would still tuck under the LH flap, otherwise it will be too narrow and won't tuck in.

The good thing about this style of card is that you can turn it around and have the small flap at the RHS instead, or vertically so that the small flap is at the top, or the other way up so that the small flap is at the bottom.  Very versatile and something a bit different to the norm - and easy.

If you need any clarification of the measurements etc, please don't hesitate to EMail me - or leave me a comment and I'll edit this post.  My Email address is on the LHS of my Blog - scroll down a little just past the "Hello and welcome to my Blog" and click on the link provided which will open up your EMail program automatically with my address already popped in for you.

Thanks again for stopping by - hope to see you again soon!

Jocelyn


Card Recipe:

Stamps:  Sentiment from Wendy Irving Expressions J6412.01 clear set

Ink:  Stazon Jet Black

Accessories:  Cuttlebug, Bunch of Daisies embossing folder from 'With Love' Cuttlebug set, Craft Concepts Budding Vine embossing folder, Spellbinder Ribbon Tags Trio, Bow Easy, white organza ribbon 10mm - 3/8" wide, .008 fine white glitter, Designer Dries clear adhesive (for glitter), The Paper Mill White A2 Matchbook cards PMAZMW - Riot Art and Craft

Punches:  EK Success Arrows Border

Friday, September 24, 2010

Basket of roses for an 80th birthday!


Hello and thanks for visiting :-)

I've been a bit quiet on the cardmaking-front this week: it's school holidays plus I haven't been well - but I did manage to make this card which is for a lady's 80th birthday which was quick and easy.  I didn't want the card to 'SHOUT' 80 years old because I know this person wouldn't like it - so I just merely tried to make something elegant and pretty for the occasion.  


This basket of roses is an old PSX (Personal Stamp Exchange) stamp which I have had forever.  PSX are no longer in business but I believe Inkadinkado bought alot of their beautiful designs.  I did actually find this PSX stamp on EBay USA for about US$8 - and then found another one for US$52!!  Eeek - it pays to check your prices!!  Some of the rarer PSX stamps sell for heaps on EBay - I am sitting on a goldmine - pity I love them so much that I don't want to sell them!!  Anyway, enough waffling, and onto the card itself.......

I stamped the image with Versafine Vintage Sepia, heat-set it, then coloured it with OMS and a mix Prismacolor and Derwent Colorsoft pencils.  I added some pink I-Kan-dee Pearlescent chalk around the image which adds a soft, subtle sparkle - alas not really captured by the camera :-(

The tiny pink hearts are the leftover punchies from my EK Success Arrows border punch; I added some pink AI glitter to them.

The BEAUTIFUL white embossed background was done with a new embossing folder by an Australian company called Craft Concepts which only arrived in my mailbox this week.  I had it on Pre-order for months and so glad it's finally here.  Not sure if you can get it outside Australia.  It uses the same sandwich in your Cuttlebug as other folders, ie: A plate, B plate, folder w/cardstock, B plate.  

Please note that the pink cardstock deckled oval was hand-cut so I could have a small border to the main image panel.  The ribbon was made in 2 separate elements, and the bow itself was made with my Bow Easy.

The sentiment is from a set by Elzybells who are closing on the 30th September :-(   Just checked on their website, and it's sold out.

Challenges:  

I am popping this card into the Splitcoaststampers 'Free for All' Challenge F4A24 of "It's garden pickin' time" where the main image is from your garden - either fruit or flowers.  As it is Spring here where I live and my garden is alive with daffodils, anemones, freesias and carpet roses after a long, cold Winter, I HAD to pick flowers for the main image.

Thanks again for stopping by - hope to see you again soon!

Jocelyn


Card Recipe:

Stamps:  PSX G-2548 (retired), Sentiment: from Elzybells Spring Cubes 20-015-CC clear stamp set (no longer available)

Ink:  Versafine Vintage Sepia

Accessories:  Cuttlebug, Spellbinder Large Deckled Oval Nestabilities, Craft Concepts Budding Vine embossing folder, I-Kan-Dee pearlescent chalk, OMS, Prismacolor pencils, Derwent Coloursoft pencils, paper stumps, Art Institute pink glitter, Bow Easy, pink sheer ribbon, heat-gun, Cardstock: KW Doggett Knight white, Bazzill pink, Basic Grey pink rhinestones

Punches:  EK Success Arrows border, Stampin' Up corner