This is also my card for the following Challenges (click on the underlined link to their respective websites for more info):
Showing posts with label Elzybells. Show all posts
Wednesday, April 17, 2024
Penny Black Critters in Love Wedding Anniversary Card
Hi everyone π
Today I am sharing a Wedding Anniversary card that I made for my husband. We are celebrating 35 years! It really doesn't seem that we were married that long ago but somehow, it is!!
I am fortunate that my husband loves cute critters and especially cats on his cards which it makes things so much easier because I have a ton of cute Penny Black critters and loads of catsπ
This is also my card for the following Challenges (click on the underlined link to their respective websites for more info):
Penny Black Saturday Challenge - PBSC April - Anything Goes with Optional Extra of Numbers
Crafty Catz Challenge - #669 - Anything Goes + Any Cute Critter
Splitcoaststampers - Free for All Friday Challenge - F4A729 - Cute Animals
The main image is by Penny Black from the set "Critters in Love". Isn't it sweet?! I stamped it onto Bellbird Paperarts Watercolour paper using Versafine Onyx Black ink and coloured it with a mix of Derwent Inktense and Lyra Watercolour pencils using a #2 round paintbrush. I punched a heart using my Carl Craft Heart Duo CP-8 punch and glued it on using Tombow Mono Aqua glue. I went over all the black lines on the image with a Zig .01 Black Pen to darken then up again. I diecut the image and the other layers using my Big Shot and Lifestyle Nesting Circles dies.
The sentiment is by Elzybells from their Swirly Greetings set. Unfortunately Elzybells are no longer in business. I still miss them and treasure all the stamps that I have. I can't ever imagine having to part with them - I LOVE them! I used an Impression Obsession Mini Heart Row die to add the hearts either side of the sentiment. I glued them on with Tombow Mono Aqua glue. I diecut the sentiment using a Spellbinders Labels Trio die and popped it up.
Here is a close-up of the image:
The designer papers are by Bo Bunny - Love Letters - and are really old - from 2012.
The teal and cherry and cardstock layers on the card base were trimmed to 1/16" using my WRMK Layer Guides. The black layer was trimmed to 1/8".
The side panel punched border was done with a Fiskars Scallop Border punch. I added the ribbon in 2 separate elements. The side panel is popped up. For the most part, I use scraps of cardstock to pop up panels instead of dimensionals. It saves money and uses up my scraps. I added the ribbon in two separate elements.
Lastly, I added some Wink of Stella Clear Glitter brush to the 3 hearts.
Once I had finished the card front, I glued it to a white card base using my favourite glue - Tombow Mono Multi. Finished size is 5" x 5" or 126mm x 126mm.
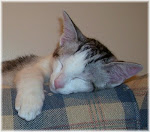
I'll finish with a cute photo of our Freya:
Thanks for visiting my blog today.
Jocelyn
Card Recipe:
Stamps: Penny Black Critters in Love 30-028 clear set, Elzybells Swirly Greetings 20-004-CB clear set (retired)
Ink: Versafine Onyx Black
Designer Paper: Bo Bunny Love Letters 6" x 6" pad (retired - from 2012)
Accessories: Big Shot, Zig .01 Black pen, Derwent Inktense and Lyra Watercolour Pencils, Born #2 round Taklon paint brush, 3/8" wide Ribbon (stash), We R Memory Keepers Layer Guides, Bellbird Paperarts 140lb Cotton Watercolour Paper, Kaisercraft Paper Trimmer, Stamping Platform, Tombow Mono Multi and Mono Aqua Glue, Cardstock - Black, Teal + Kaisercraft Cherry + scraps of white, Anko White Card Base (KMart)
Dies: Lifestyle Nesting Circles L-CC-001 (retired), Impression Obsession Mini Heart Row DIE134-D, Spellbinder Shapeabilities Labels Trio S3-147 (retired)
Punches: Carl CP-8 Heart Duo, Fiskars Scallop Border
Labels:
Anniversary,
Big Shot,
Elzybells,
Impression Obsession,
Lifestyle Dies,
Love,
Penny Black,
Spellbinder,
Watercolour pencils,
Watercolouring,
Wedding Anniversary
Tuesday, September 20, 2022
Tatty Teddy Sweet Shoppe Birthday Card
Hi everyone π
I have been so flat out creating masculine cards that I forgot to share the Birthday Card that I made for our daughter's 19th birthday. Silly me!
The main image is 3D decoupage and is by Trimcraft from their Tatty Teddy Sweet Shoppe range which I have had for quite a while. Most of the designer papers are from the same range other than the paper with the ribbon which is from my scrap bin (don't know what brand sorry).
All the layers were trimmed to 1/18" using my Perfect Layers Tools.
The sentiment is a retired one by Elzybells and was stamped using Versafine Onyx black ink.
The satin ribbon is from my stash.
The pink and white heart embellishments around the image I picked up at a Craft Show but there is no brand name. I thought they matched the card perfectly.
Thanks for stopping by!
Jocelyn
Card Recipe:
Stamps: Sentiment (retired) - Elzybells
Ink: Versafine Onyx Black
Designer Paper: Trimcraft Sweet Shoppe, scrap (unknown brand)
Accessories: Pink and white heart embellishments, Trimcraft Sweet Shoppe Tatty Teddy decoupage, dimensionals, Tombow Mono Multi glue, fabric glue, Perfect Layers Tools, satin ribbon (stash), cardstock - white + white card base
Labels:
Birthday,
Decoupage,
Elzybells,
Feminine,
Paper Tole,
Tatty Teddy,
Trimcraft
Wednesday, December 29, 2021
Lili of the Valley James in the Snow Christmas Card
Hi everyone π
Today I am sharing a Christmas Card that I made for my daughter. It was a last-minute make on Christmas Eve as we were away on holidays for the first few weeks of December (finally, after more than 2 years and in and out of Lockdown) so it was wonderful to relax and sit by the river - nothing to think about except what to eat or whether I should have a coffee or not. I made lots of Christmas cards when I was away - mainly from kits as it is more practical to take them away than taking a pile of craft stuff. But I was chasing my tail a little when we got back with lots of stuff organise in time for Christmas! We struggled to get a (real) Christmas tree this year as apparently there was a shortage. We usually get one from the local Scouts which is a great fundraiser for them but they had a 'sold out' sign when you can usually get a tree right up till just before Santa is heading down the chimney.
This is also my card for following Challenges:
Craftyhazelnut's Christmas - Challenge 574 - Anything Goes with the optional theme of any Christmas or New Year card
Winter Wonderland - End of Year Challenge - Anything Goes Christmas
Please click on the underlined links to go to the Challenges.
The main image I bought many years ago as an unmounted rubber stamp from Lili of Valley UK - but you can get it in digital form from their Etsy Store HERE.
I stamped the image with Versafine Onyx Black ink onto Ranger watercolour cardstock and coloured it with Lyra + Faber-Castell watercolour pencils and a #2 round paintbrush. I paper-pieced the hat and scarf using some designer paper from an old retired pad - BoBunny Snowfall. I added some shading with a grey watercolour pencil. The fluffy stuff on the hat and the snow on the ground is Stampendous Cotton Ball White Fun Flock mixed with Crystalina glitter which was glued on using Tombow Mono Multi glue.
The falling snow around the bear is Nuvo White Blizzard Glitter drops. It is my first time using them and I love the dimension it gives. Now, of course, I want to get more colours π
I used my Lifestyle Nesting Circle dies and Big Shot for the main image and layers. The other designer papers are also from a retired pad by Echo Park - Winter Park.
The snowflakes were diecut from aqua glitter cardstock using my Impression Obsession Small Snowflake Set DIE100F. I added some Kaisercraft Ice Blue Rhinestones to the centres.
The ribbon is from my stash and was attached in two separate elements and the bow itself was tied using my Bow Easy. The sentiment tag is a die by Cuttlebug - Tiny Tags - 37-1222. This die set, although retired, has been one of my most-used dies over the years. The sentiment is by Elzybells (who are no longer in business) from their Mini Messages - Christmas - 20-054 clear set. I added some tiny Molossi light blue rhinestones underneath.
The burgundy and light blue base cardstock layers were trimmed to 1/8" using my Perfect Layers Tools and the dark teal cardstock was trimmed to 1/16".
Once I had finished the card front, I glued it to a white card base using Tombow Mono Multi glue.
Thanks for visiting my Blog today! Happy New Year everyone!
Jocelyn
Card Recipe:
Stamps: Lili of the Valley (UK) - James Bear in the Snow, Elzybells Mini Messages - Christmas 20-054 clear set (retired)
Ink: Versafine Onyx Black
Designer Paper: BoBunny Snowfall Item #6PF927 6" x 6" pad (retired), Echo Park Winter Park Item #WK23023 6" x 6" pad (retired)
Accessories: Big Shot, Cuttlebug, Ranger watercolour cardstock, ribbon - stash, Bow Easy, Perfect Layers Tools, Stampendous Cotton Ball White Fun Flock, Crystalina glitter, Nuvo White Blizzard Glitter drops, dimensionals, Lyra + Faber-Castell watercolour pencils, #2 round paintbrush, Tombow Mono Multi glue, Kaisercraft Ice Blue SB774 rhinestones, Molossi tiny blue rhinestones, cardstock - aqua glitter, burgundy, light blue, dark teal, white card base
Dies: Lifestyle Nesting Circles, Impression Obsession Small Snowflake Set DIE100-F, Cuttlebug Tiny Tags 37-1222 (retired)
Labels:
Big Shot,
Christmas,
Cuttlebug,
Cuttlebug Dies,
Elzybells,
Impression Obsession,
Lifestyle Dies,
Lili of the Valley,
Watercolour pencils,
Watercolouring
Tuesday, August 11, 2020
Couture Creations Sunburnt Country Anniversary Card
Hi everyoneπ
Today I am sharing a card that I made for my husband to celebrate our 31st Wedding Anniversary.
We don't fuss too much about Anniversaries and have never followed any of the traditional symbols for the occasion eg: Silver is for 25 years etc. nor given each other gifts - only cards - and are content to stay at home, have a special home-cooked meal and just be together. We have each other and our beautiful daughter and that is all we need π
We have many birds that visit our garden including Rainbow Lorikeets which we all feed. They are noisy and cheeky and we enjoy them so much which was why I chose the Rainbow Lorikeets paper tole image by Couture Creations from their Sunburnt Country range.
My husband loves all manner of cute and cuddly critters so this makes cardmaking alot easier for meπ
The paper tole image came already diecut and there aren't alot of layers so it was super-easy to pop them out and put them together with dimensionals. I used my Big Shot and Lifestyle Nesting Circle dies to diecut the layers underneath the paper tole image.
All the papers are from the same Couture Creations Sunburnt Country collection. I have been really loving this range by Couture Creations and it is so refreshing to have Australian flora and fauna images. They are just about to release a new range called Sweeping Plains and I have already pre-ordered it as I am sure that it will sell out really quickly. No connection to the company - but just loving Aussie-themed products. Uniquely Creative and Paper Rose are 2 Australian companies who also have a large range of Australian stamps, dies, stencils, papers etc. and I can highly recommend them having ordered from them many times - and I particularly adore the Uniquely Creative Australian animal stamps and dies. Again, no connection to them - but if you are after Australian themed products, check them out π Anyway, back to my card.................
You can see the depth of the lorikeets in this next photo:
The sentiment is by Elzybells from the Everyday Sentiments set and was stamped using Versafine Vintage Sepia ink which I thought matched the rest of the earthy colours of the rest of the card rather than using a stark black ink. Elzybells have been out-of-business for a long time now but I still love their stamps as much as the first day I laid my eyes on them. I diecut the sentiment using a Spellbinders Labels Trio Shapeabilities die.
I punched a heart from some scrap red designer paper and glued it on beside the sentiment and added a wee bit of sparkle using my Wink of Stella Clear Glitter brush.
I tied on some rope twine which I bought at my local newsagent and is made by Hallmark. Technically, it is made for tying around a gift.
Lastly, I layered the finished panel onto a white cardstock base using Tombow Mono Multi glue.
Finished size is 5-1/2" x 5-1/2" or 14cm x 14cm.
Thanks for visiting my Blog today.
Jocelyn
Card Recipe:
Stamps: Elzybells Everyday Greetings clear set (retired)
Ink: Versafine Vintage Sepia
Accessories: Big Shot, Couture Creations Lorikeets diecut decoupage, Wink of Stella Clear Glitter brush, dimensionals, Tombow Mono Multi glue, Hallmark twine, Perfect Layers Tools, Cardstock - white
Dies: Lifestyle Nesting Circles, Spellbinder Labels Trio Shapeabilities S3-147 (retired)
Punches: Carl CP-8 Heart duo
Labels:
Big Shot,
Couture Creations,
Decoupage,
Elzybells,
Lifestyle Dies,
Paper Tole,
Spellbinder,
Wedding Anniversary
Thursday, December 27, 2018
Another Helz Cuppleditch decoupaged Christmas card!
Hi everyone

Today I am sharing another Christmas card that I made for my niece. If you missed my last post, I made quite a few Christmas cards using one of my favourite designers, Helz Cuppleditch, Christmas decoupage collections.
This card uses an older collection called "The Night Before Christmas". The decoupage (also known as paper tole) pad I bought on EBay from the UK during 2018. Isn't the image just so ADORABLE! I really love snowmen - which is probably odd because it never snows where I live and it is Summer at Christmas-time.
I am also popping this card into the following Challenges (click on the underlined words/links which will take you directly to the Challenge:
Craftyhazelnut's Christmas Challenge 417 which is 'Anything Goes' (as long as it's Christmas) and the optional theme is to use the word 'Christmas'.
Winter Wonderland Challenge Blog - End of Year Anything Goes
Splitcoaststampers - Free for All Friday F4A460 - Holiday Card Show Off 2018 which is to show off your Christmas, Hanukkah, Winter or Holiday cards.
The decoupage images came already diecut so it was easy to just pop out the pieces and put them together using dimensionals.
All the designer papers are by My Mind's Eye - 12 Days of Christmas - which is one of my favourite collections from years gone by. I added the main image onto some of the MME paper and trimmed it to 1/8" using my Perfect Layers Tools then rounded the edges with my Corner Chomper to match the image. I added a punched border to the bottom panel using an EK Success Scalloped Scallop punch and trimmed the top part of the panel to 1/8". I added the ribbon in 2 separate elements and the bow itself was made using my Bow Easy. I attached the bow using Helmar 450 quick dry adhesive. I trimmed the papers on the base panel to 1/16" and 1/8" respectively.
I had a bunch of snowflakes that I diecut from silver glitter cardstock a while ago ready to use on my Christmas cards (sorry, I don't know which dies I used) and glued them on using Tombow Mono Aqua glue then added Kaisercraft silver rhinestones to the centres.
The sentiment is an old one from Elzybells (now out of business) and was stamped using Versafine Onyx Black ink. I diecut it using my Big Shot and a My Favorite Things Fishtail Flag Stax die. The die only has a fishtail only on one end so I simply popped it back in my Big Shot to cut the other end. I layered it onto some of the MME paper and trimmed it with my scalpel then added tiny green Molossi rhinestones to each end of the sentiment.
Lastly, I glued my card front onto a cream cardstock base using Tombow Mono Multi glue.
The image came already glittered but unfortunately you can't see it in the photo - however, it does look very pretty in real life. It was super-windy and hot so I had to take the photo on my decking table in the shade out-of-the-wind where the light wasn't so great and I couldn't retake the photo the next day because I had already given it to my niece.
Thanks for visiting my blog today.
Jocelyn
Card Recipe:
Stamps: Elzybells Mini Messages - Christmas 20-054 clear set (retired)
Ink: Versafine Onyx Black
Designer Paper: My Mind's Eye - 12 Days of Christmas 12" x 12" (retired)
Accessories: Trimcraft - Helz Cuppleditch - 'Night Before Christmas' (2015) diecut decoupage, Big Shot, dimensionals, Kaisercraft silver rhinestones, Molossi tiny green rhinestones, cardstock - cream card base and silver glitter, Kokuyo tape runner, Tombow Mono Multi glue, Tombow Mono Aqua blue, Helmar 450 Quick Dry adhesive, Perfect Layers Tools, American Crafts ribbon, Bow Easy
Dies: Various brands of Snowflake dies, My Favorite Things Fishtail Flag Stax dies
Punches: EK Success Scalloped Scallop border EKPL8003, Corner Chomper
Labels:
Big Shot,
Christmas,
Decoupage,
Die-namics dies by MFT,
Elzybells,
Helz Cuppleditch,
Paper Tole,
Trimcraft,
Winter
Monday, July 3, 2017
Elzybells Teddy Surprise birthday card
Hi everyone
Today I am sharing a birthday card that I made for my daughter using a retired Elzybells stamp set called "Teddy Surprise" - but Penny Black brought out a set using all but one of the images on my card which is called "Wishes and Hugs" PNY-CS-30222 which is fantastic. I am super-happy that some of the Elzybells images are still available: I still adore them as much as I did when I first started cardmaking years ago π The only image that is missing from the set is my first image ie: just the present.
This is also my card for the following Challenges:
Cute Card Thursday - Challenge 484 - Anything Goes
Crafty Catz - Challenge 377 - Anything Goes with an Optional Twist of Embossing - dry and/or heat. I used dry embossing.
Little Red Wagon - Challenge 400 - Three of a Kind - it can be three identical items or three items of a similar kind. My three items are the 3 images as well as the 3 presents.
I stamped the images using Ranger Archival Jet Black ink onto Ranger Watercolour cardstock and coloured them (other than the presents) using Derwent Inktense pencils + Faber-Castell watercolour pencils and a #2 round paintbrush. I went around the images with a light blue watercolour pencil and faded the colour out.
I inked up just the presents then restamped on my designer paper so I could paper-piece the presents. The paper came from Riot Art and Craft and is by My Memories and I used the flip-side to paper-piece the presents. I coloured the circles with a dark purple watercolour pencil. I also re-stamped the bear's paws on image #2 and popped them up on dimensionals so they were higher than the present and looked more realistic. I went around all the images with a black marker to hide any white lines/my uneven cutting. Here is a close-up of the 2nd image:
I thought it would be fun to have a "lift-up" panel on the card front as my take on the trendy interactive cards. The dry embossing is my old favourite Cuttlebug embossing folder called Swiss Dots which I embossed using my Big Shot.
Lawn Fawn recently came out with a stamp and die set called "Push Here" which has all that you need for when you make interactive cards and want to let the recipient know what to do with their card - so I used the "Open Here" stamp with the half-circle stitched die which you can see in the 1st photo.
I trimmed all the card layers to either 1/16" or 1/8" using my Perfect Layers Tools. I used my EK Success Arrows border punch to punch tiny little hearts (if you a regular reader of my blog, you know that the leftover punchies look like tiny hearts to me!) and popped them around the 2nd image and the image inside the card.
The inside dry embossing is also an old favourite Cuttlebug folder called Happy Birthday which is still readily available or there are several other brands of similar embossing folders.
I added the lilac organza ribbon in 2 separate elements and the bow itself was made using my Bow Easy. I added Fray Stop to the cut ends to stop them from fraying.
Of course, everything got the glitter-treatment from my Stampin' Up Dazzling Details glitter glue: the circles and bows on the presents, butterflies, tiny hearts, balloons, teddy's cheeks and confetti.
I went over parts of the images with a Copic black fine multiliner pen to darken some of the black lines especially the eyes, nose and mouth. Here is a close-up of the inside image:
Do you still visit blogs on a regular basis? With so many online sharing platforms these days such as Instagram, Flickr, Pinterest, Facebook, You-Tube etc., I sometimes wonder how much blogs have perhaps taken a back seat compared to years ago when I first started this blog. Perhaps people are more interested in seeing the finished product and not necessarily interested in the process of how it was made(?). I know my viewing habits have changed in the past couple of years and I watch more You-Tube than I do television. I also love to share my garden/nature/sky/cat photos on Instagram which I joined about 18 months ago. You just run out of time to look at everything otherwise you would be online 24/7 and never do anything else! Let me know your thoughts in a comment π
Thank you for visiting my blog today!
Jocelyn
Card Recipe:
Stamps: Elzybells Teddy Surprise 20-016-CC clear set (retired), Lawn Fawn Push Here
Ink: Ranger Archival Jet Black
Designer Paper: My Memories #169960 (Riot Art and Craft)
Accessories: Derwent Inktense + Faber Castell watercolour pencils, #2 round paintbrush, Cardstock - lilac, purple, Ranger Watercolour cardstock, Copic fine black multiliner pen, Perfect Layers Tools, Stampin' Up Dazzling Details glitter glue, Cuttlebug (Provocraft) Happy Birthday 37-1133 + Swiss Dots 37-1604 embossing folders, Big Shot, Scor-Pal, dimensionals, Kokuyo Dotliner 8.4mm tape runner, Tombow Mono Multi glue, lilac organza ribbon, Bow Easy, Fray Stop
Dies: Lawn Fawn Push Here
Punches: EK Success Arrows border
Labels:
Big Shot,
Birthday,
Cuttlebug,
Elzybells,
Feminine,
Interactive Cards,
Lawn Fawn dies,
Lawn Fawn Stamps,
Watercolour pencils,
Watercolouring
Thursday, December 31, 2015
Christmas card No. 2 - Stampendous Candy Bear
Hi blogging friends
Whew, sure is hot here today - 42.7 deg C (that's just short of 109 deg F if you are imperial)! Good for catching up on stuff indoors - like cleaning my Craft Room. It never ceases to amaze me how much mess I can make just from making a few cards - although I am sure I am not alone, hee hee! Today I am sharing another Christmas card which I made on Christmas Eve - and I gave this one to my daughter.
This is also my 2nd card for each of the following Challenges:
Holly Jolly Christmas Challenge - December - Anything Goes
Craftyhazelnut's Challenge Extra - December - Anything Goes
The image is by Stampendous and is retired but is just so adorable, don't you think?! I stamped the image onto watercolour paper using Ranger Archival Jet Black ink and coloured it with Faber-Castell watercolour pencils using a #2 round paintbrush.
I added dots of white acrylic paint onto the bear's scarf using a very fine stylus as well and I painted a fine white line down the centre of the candy cane for a highlight using a Liner brush. I lightly chalked around the image with Kaisercraft blue chalk and added snow using Stampendous Cotton White Fun Flock mixed with fine Crystalina glitter - which was also used to add fuzz to the hat. Here is a close-up:
I popped the image panel up on 2mm dimensionals.
The green dry embossing is an embossing folder by Crafts Too - Christmas Holly Frame. I layered the panel onto some red cardstock and trimmed the layers to 1/16" using my Perfect Layers Tools. I added the red reindeer ribbon from my stash then attached the panel to a white cardstock base.
The sentiment is by Elzybells (sadly no longer in business but Penny Black has reissued some images over the past few years) - and was diecut using a Cuttlebug Tiny Tags die. I added a tiny Couture Creations red rhinestone at each end of the sentiment panel. I tied the tag on using Doodlebug Ladybug twine and added a dimensional to hold the tag firmly to the cardstock. I added Fray Stop to the cut ends of the twine to stop it from fraying/unravelling.
Lastly, I adhered the glittery sparkly snowflake from my stash using Crafter's Pick Incredibly Tacky glue.
Thanks for stopping by.
Jocelyn
Card Recipe:
Stamps: Stampendous Candy Bears E208 (retired), Sentiment: Elzybells Mini Messages - Christmas clear set 20-054 (retired)
Ink: Ranger Archival Jet Black
Designer Paper: None
Dies: Cuttlebug Tiny Tags
Accessories: Cuttlebug, Crafts Too Christmas Holly Frame, Perfect Layers Tools, Doodlebug Ladybug twine, red/white reindeer ribbon (stash), Fray Stop, Couture Creations tiny red rhinestones, Stampendous Cotton White fun flock mixed with fine Crystalina glitter, Tombow Mono Aqua glue, Stampin' Up Fuse Fast adhesive, Crafter's Pick Incredibly Tacky glue, 2mm dimensionals, snowflake embellishment (stash), Jo Sonja white acrylic gouache, stylus, #2 round + liner paintbrush, Faber-Castell watercolour pencils, 140lb watercolour paper, Kaisercolour blue chalk, cardstock - red, green, white

Whew, sure is hot here today - 42.7 deg C (that's just short of 109 deg F if you are imperial)! Good for catching up on stuff indoors - like cleaning my Craft Room. It never ceases to amaze me how much mess I can make just from making a few cards - although I am sure I am not alone, hee hee! Today I am sharing another Christmas card which I made on Christmas Eve - and I gave this one to my daughter.
This is also my 2nd card for each of the following Challenges:
Holly Jolly Christmas Challenge - December - Anything Goes
Craftyhazelnut's Challenge Extra - December - Anything Goes
The image is by Stampendous and is retired but is just so adorable, don't you think?! I stamped the image onto watercolour paper using Ranger Archival Jet Black ink and coloured it with Faber-Castell watercolour pencils using a #2 round paintbrush.
I added dots of white acrylic paint onto the bear's scarf using a very fine stylus as well and I painted a fine white line down the centre of the candy cane for a highlight using a Liner brush. I lightly chalked around the image with Kaisercraft blue chalk and added snow using Stampendous Cotton White Fun Flock mixed with fine Crystalina glitter - which was also used to add fuzz to the hat. Here is a close-up:
I popped the image panel up on 2mm dimensionals.
The green dry embossing is an embossing folder by Crafts Too - Christmas Holly Frame. I layered the panel onto some red cardstock and trimmed the layers to 1/16" using my Perfect Layers Tools. I added the red reindeer ribbon from my stash then attached the panel to a white cardstock base.
The sentiment is by Elzybells (sadly no longer in business but Penny Black has reissued some images over the past few years) - and was diecut using a Cuttlebug Tiny Tags die. I added a tiny Couture Creations red rhinestone at each end of the sentiment panel. I tied the tag on using Doodlebug Ladybug twine and added a dimensional to hold the tag firmly to the cardstock. I added Fray Stop to the cut ends of the twine to stop it from fraying/unravelling.
Lastly, I adhered the glittery sparkly snowflake from my stash using Crafter's Pick Incredibly Tacky glue.
Thanks for stopping by.
Jocelyn
Card Recipe:
Stamps: Stampendous Candy Bears E208 (retired), Sentiment: Elzybells Mini Messages - Christmas clear set 20-054 (retired)
Ink: Ranger Archival Jet Black
Designer Paper: None
Dies: Cuttlebug Tiny Tags
Accessories: Cuttlebug, Crafts Too Christmas Holly Frame, Perfect Layers Tools, Doodlebug Ladybug twine, red/white reindeer ribbon (stash), Fray Stop, Couture Creations tiny red rhinestones, Stampendous Cotton White fun flock mixed with fine Crystalina glitter, Tombow Mono Aqua glue, Stampin' Up Fuse Fast adhesive, Crafter's Pick Incredibly Tacky glue, 2mm dimensionals, snowflake embellishment (stash), Jo Sonja white acrylic gouache, stylus, #2 round + liner paintbrush, Faber-Castell watercolour pencils, 140lb watercolour paper, Kaisercolour blue chalk, cardstock - red, green, white
Labels:
Christmas,
Crafts Too,
Cuttlebug,
Cuttlebug Dies,
Elzybells,
Stampendous,
Watercolour pencils,
Watercolouring
Tuesday, December 23, 2014
Stampendous Snow Bears on Ice Circle card
Hi blogging friends
Today I am sharing a Christmas card which I made for my dearest friend C who lives on the other side of Australia. C is the kindest and most generous friend you could ever know - and has been an amazing support to our family since our loved one was diagnosed with a life-threatening illness in February 2012. C is also a very talented cardmaker so I love our long chats on the phone about cardmaking. Now that C has the card in her hot little hands, I can share it here:
The main image is by Stampendous - Snow Bears on Ice - which I have had forever and as far as I know, is retired - and was stamped using Ranger Archival Jet Black ink onto Ranger Distress watercolour cardstock and coloured with a variety of mediums: Tombow pens, Ranger Distress Markers and Faber-Castell watercolour pencils. I used a tiny round 5/0 paintbrush to dot white acrylic paint on the scarves. I coloured around the image with blue chalk.
I went over the red hats using a Wink of Stella red glitter pen and added Stampin' Up Dazzling Details glitter glue underneath the skates. I also added Cotton White Fun Flock mixed with Crystalina glitter to the cuff and pom-pom on the hat using Tombow Mono Aqua glue.
Here is a close-up:
It is a bit hard to see the sparkle as the weather was very dreary on the day I took the photo. An hour later, the card was in the post so I didn't have much choice!
The snowflakes are by My Favorite Things from their Snowflakes Trio die set. I glued down just the centres and bent the snowflake arms (is that what they are called??) up a little to give them some dimension against the white cardstock, then added red rhinestones to the centres.
The sentiment is from Elzybells (who are no longer in business) and I added a green rhinestone to each end.
The white cardstock base was originally a square pre-folded card and was diecut using a Lifestyle Nesting Circle die but I moved the die up a little so that I still had a small fold at the top. I dry-embossed the circle cardstock base using my Big Shot and Cart-Us Snowflakes embossing folder, then all I had to do was layer the main image panel on. All the circle/scalloped circle diecuts are from the Lifestyle Nesting Circle/Scalloped Circles sets. I really love these sets because you get oodles of dies in them - from tiny circles to really large circles that are big enough to make a circle card: great value in my opinion.
I really should make more circle cards - they are a fun change from the regular square or rectangular cards.
Lastly, I used my Bow Easy to tie a double-bow out of my Doodlebug twine and glued it on using Glossy Accents. I put some weight on it whilst it dried to hold it firmly. As always, I added Fray Stop to the cut ends to stop them from fraying.
Challenges:
I am popping my card into the following Challenge -
Craftyhazelnut's Christmas Challenge Extra - December - Anything Goes
This will be my last post before Christmas. I have one more Christmas card to share but as that person won't be opening it until Christmas Day, I can't share yet - plus they read my blog so sharing it beforehand would spoil the surprise.
Merry Christmas and a happy 2015 to you all - and thanks so much for your support, comments and emails throughout this year.
Thanks for visiting my blog today!
Jocelyn
Card Recipe:
Stamps: Stampendous Snow Bears on Ice D144 wood-mount (retired), sentiment from Elzybells Mini Messages 20-054 clear set (retired)
Ink: Ranger Archival Jet Black
Dies: Lifestyle Nesting Circles and Nesting Scalloped Circles, My Favorite Things Die-namics Snowflakes Trio
Accessories: Big Shot, Tombow pens, Ranger Distress Markers, Faber-Castell watercolour pencils, #2 and 5/0 round paintbrush, Stampin' Up Dazzling Details glitter glue, Wink of Stella red glitter pen, JoSonja white acrylic paint, Stampendous Cotton White Fun flock mixed with fine Crystalina glitter, Tombow Mono Aqua and Mono Multi glue, Kaisercraft blue chalk, Bow Easy, Fray Stop, Doodlebug Ladybug twine, green and red rhinestones from stash, Ranger Distress watercolour cardstock, other cardstock - white, green, red
Today I am sharing a Christmas card which I made for my dearest friend C who lives on the other side of Australia. C is the kindest and most generous friend you could ever know - and has been an amazing support to our family since our loved one was diagnosed with a life-threatening illness in February 2012. C is also a very talented cardmaker so I love our long chats on the phone about cardmaking. Now that C has the card in her hot little hands, I can share it here:
The main image is by Stampendous - Snow Bears on Ice - which I have had forever and as far as I know, is retired - and was stamped using Ranger Archival Jet Black ink onto Ranger Distress watercolour cardstock and coloured with a variety of mediums: Tombow pens, Ranger Distress Markers and Faber-Castell watercolour pencils. I used a tiny round 5/0 paintbrush to dot white acrylic paint on the scarves. I coloured around the image with blue chalk.
I went over the red hats using a Wink of Stella red glitter pen and added Stampin' Up Dazzling Details glitter glue underneath the skates. I also added Cotton White Fun Flock mixed with Crystalina glitter to the cuff and pom-pom on the hat using Tombow Mono Aqua glue.
Here is a close-up:
It is a bit hard to see the sparkle as the weather was very dreary on the day I took the photo. An hour later, the card was in the post so I didn't have much choice!
The snowflakes are by My Favorite Things from their Snowflakes Trio die set. I glued down just the centres and bent the snowflake arms (is that what they are called??) up a little to give them some dimension against the white cardstock, then added red rhinestones to the centres.
The sentiment is from Elzybells (who are no longer in business) and I added a green rhinestone to each end.
The white cardstock base was originally a square pre-folded card and was diecut using a Lifestyle Nesting Circle die but I moved the die up a little so that I still had a small fold at the top. I dry-embossed the circle cardstock base using my Big Shot and Cart-Us Snowflakes embossing folder, then all I had to do was layer the main image panel on. All the circle/scalloped circle diecuts are from the Lifestyle Nesting Circle/Scalloped Circles sets. I really love these sets because you get oodles of dies in them - from tiny circles to really large circles that are big enough to make a circle card: great value in my opinion.
I really should make more circle cards - they are a fun change from the regular square or rectangular cards.
Lastly, I used my Bow Easy to tie a double-bow out of my Doodlebug twine and glued it on using Glossy Accents. I put some weight on it whilst it dried to hold it firmly. As always, I added Fray Stop to the cut ends to stop them from fraying.
Challenges:
I am popping my card into the following Challenge -
Craftyhazelnut's Christmas Challenge Extra - December - Anything Goes
This will be my last post before Christmas. I have one more Christmas card to share but as that person won't be opening it until Christmas Day, I can't share yet - plus they read my blog so sharing it beforehand would spoil the surprise.
Merry Christmas and a happy 2015 to you all - and thanks so much for your support, comments and emails throughout this year.
Thanks for visiting my blog today!
Jocelyn
Card Recipe:
Stamps: Stampendous Snow Bears on Ice D144 wood-mount (retired), sentiment from Elzybells Mini Messages 20-054 clear set (retired)
Ink: Ranger Archival Jet Black
Dies: Lifestyle Nesting Circles and Nesting Scalloped Circles, My Favorite Things Die-namics Snowflakes Trio
Accessories: Big Shot, Tombow pens, Ranger Distress Markers, Faber-Castell watercolour pencils, #2 and 5/0 round paintbrush, Stampin' Up Dazzling Details glitter glue, Wink of Stella red glitter pen, JoSonja white acrylic paint, Stampendous Cotton White Fun flock mixed with fine Crystalina glitter, Tombow Mono Aqua and Mono Multi glue, Kaisercraft blue chalk, Bow Easy, Fray Stop, Doodlebug Ladybug twine, green and red rhinestones from stash, Ranger Distress watercolour cardstock, other cardstock - white, green, red
Labels:
Big Shot,
Cart-Us embossing folders,
Christmas,
Circle Card,
Die-namics dies by MFT,
Distress Markers,
Elzybells,
Fun Flock,
Lifestyle Dies,
Stampendous,
Watercolour pencils,
Watercolouring
Tuesday, June 25, 2013
Penny Black It's from you - Wedding Anniversary card
Hi blogging friends
The card I am sharing today was for my husband in celebration of our 24th Wedding Anniversary. I am so fortunate that my husband loves cute and cuddly things and he just adores our cat Ruby - which is why I picked a Penny Black cat stamp for the card.
This is also my card for the My Time to Craft Challenge #227 of 'Spots and Stripes'. My spots are obvious of course and the stripes are in the plaid designer paper. I am also entering my card in the Penny Black June Saturday Challenge of Masculine.
I stamped the image onto watercolour paper using Versafine Vintage Sepia ink and coloured it with Derwent Inktense and Faber-Castell watercolour pencils and a paintbrush. I lightly chalked around the image using blue chalk for the sky and grey, green and brown for the ground. I stamped the image again and cut out just the envelope and popped it up to give it some dimension. I added a tiny bit of Kindyglitz Crystalina glitter glue to the envelope as I can get away with a bit of glitter on my husband's cards! I added some Glossy Accents to the hearts on the card then popped this main panel up on dimensionals.
All the designer papers are by Lili of the Valley from their Crab Apple Lane - Country Gent pad. I punched some hearts using the plaid paper and my Looped Hearts edge punch (they are the leftover punchies) and popped them up on dimensionals to the top RHS of the card.
The sentiment panel has tiny hearts at each end of the sentiment and these were punched from the plaid paper using my Arrows border punch (again, they are the leftover punchies which look like tiny hearts to me) and I added a tiny bit of Kindyglitz to them. The sentiment is from a retired Elzybells clear set: Everyday Greetings.
The punched bottom border was made using my Scalloped Scallops border punch - again using the plaid designer paper.
All the card layers were trimmed to 1/8" using my Perfect Layers Tools.
Thanks for visiting my blog today.
Jocelyn
Card Recipe:
Stamps: Penny Black 'It's from you!' 2859J wood mount, Sentiment from Elzybells 'Everyday Greetings' 20-006 clear set (retired)
Inks: Versafine Vintage Sepia
Designer paper: Lili of the Valley (UK) - Crab Apple Lane Country Gent 8" x 8" pad
Accessories: Big Shot, Spellbinder Rectangle Nestabilities, Perfect Layers Tools, 140lb watercolour paper, Derwent Inktense + Faber-Castell watercolour pencils, paintbrush, Kindyglitz Crystalina glitter glue, Glossy Accents, Kaisercolour chalks, Fray Stop, brown grosgrain ribbon, dimensionals, cardstock - kraft
Punches: EK Success Arrows border, EK Success Scalloped Scallops, Martha Stewart Looped Hearts edge
Labels:
Big Shot,
Elzybells,
Masculine,
Nestabilities,
Penny Black,
Spellbinder,
Watercolour pencils,
Wedding Anniversary
Sunday, November 18, 2012
Elzybells Teddy and Tree - a Christmas card at last!
Hi blogging friends

At last, a CHRISTMAS card to share.....and it's another teddy bear card LOL!! Just a very simple design/layout as I do feel a bit rusty having not made very many cards this year.
This very sweeeet little teddy is a retired Elzybells stamp. Elizabeth Bell who ran Elzybells Stamps UK is now a designer for Penny Black Stamps and they have brought out a number of Elizabeth's designs over the past year so I am really hoping that they will bring out some more Christmas ones as I always get asked where people can buy the Elzybells stamps. Please note that I am unable to stamp images to share due to copyright. Occasionally I see Elzybells stamps on EBay but not often! Anyway, I am digressing as usual.......
The image was stamped on Watercolour paper with Versafine Onyx black ink and watercoloured with watercolour pencils and a small round paintbrush. I lightly chalked around the image with blue chalk and added some brown/grey chalk along the bottom of the image.
I added some Glossy Accents to the red baubles (not that you can really see it) and some Gold FlowerSoft using Aleen's tacky glue to the tinsel on the tree. I had quite forgotten I had bought gold and silver FlowerSoft and found it when I was tidying up my craft room. Here is a wee close-up:
The designer paper is by Kaisercraft and is very sparkly and glittery in real life; you can probably see a little of the sparkle in my photos.
The green satin ribbon was attached in 2 separate elements and the bow itself was made with my Bow Easy. I also found some jingley bells when I was tidying up so added one with some gold cord just for a bit of fun as the card jingles when you shake it. I added Fray Stop to the ribbon and cord ends to stop them from fraying.
I could have gone crazy with lots of embellies but wanted to hold back on them because I might give this card to my husband as he is the sort of guy who doesn't mind cute images like teddy bears and a bit of glitter or sparkle - but obviously I wouldn't tizz a card up too much for him.
Challenges:
I am entering my card in the following challenges -
Crafty Catz Challenge Blog Challenge #159 - Make it sparkle I hope the glittery designer paper and the gold FlowerSoft is sparkley enough
Crafty Hazelnut's Christmas Challenge #99 - use something more than 6 months old Everything on my card is more than 6 months old.
Winter Wonderland Challenge - Oh Baubles! - make any Christmas project with baubles.
My loved one has a swag of medical appointments this coming week so I probably won't be posting again for a week - plus we are waiting on some test results which we get this coming Monday. Hopefully, all the results will be good as there is nothing to indicate otherwise yet it is hard not to be nervous about them.
Thanks for stopping by! Have a fab weekend!
Jocelyn
Card Recipe:
Stamps: Elzybells Teddy with tree (retired)
Ink: Versafine Onyx black
Designer paper: Kaisercraft Be Merry Collection
Accessories: 140lb watercolour paper, Faber-Castell and Lyra watercolour pencils, small round paintbrush, gold FlowerSoft, Aleen's tacky glue, gold bell, Cuttlebug, Spellbinder Circle and Scalloped Circle nestabilities, Glossy Accents, Bow Easy, Perfect Layers Tools, green satin ribbon, gold cord, Fray Stop (for the ribbon ends), cardstock - red and green
Labels:
Christmas,
Cuttlebug,
Elzybells,
Flowersoft,
Nestabilities,
Spellbinder,
Watercolour pencils
Saturday, December 17, 2011
Penny Black Teddy Santa - number two
I have another Christmas card to show you using one of my favourite Penny Black images. I made a similar one a few weeks back but I changed the layout and changed around a few of the colours. Here is a link to my post so you can see the original one.
The image was stamped onto watercolour paper and
coloured with Faber-Castell plus Derwent Inktense watercolour pencils.
I added some Fun Flock mixed with Crystalina glitter to the hat using
Designer Dries Clear adhesive - and added Kindyglitz Crystalina glitter
glue to the present.
The tag was diecut using my Cuttlebug and a Cuttlebug Tiny Tags die and the sentiment is from a retired Elzybells clear set which I stamped using Versamagic Tea Leaves chalk ink. I glued the tag underneath the ribbon knot to hold it in place.
Challenges:
I am entering my card in the Crafty Catz Weekly Challenge #113 of Santa's Hat.
I think that's about it but if you have any questions, please feel free to either leave a comment and I'll update this post - or you can email me - my address is on my LH sidebar. Have a fab weekend and not long till you know what!
Jocelyn
Card Recipe:
Stamps: Penny Black Teddy Santa 3549F, Elzybells Mini Messages - Christmas 20-054 clear set (retired)
Ink: Versafine Onyx black, Versamagic Tea Leaves chalk
Designer paper: Kaisercraft 'Be Merry Collection'
Accessories: Cuttlebug,
Cuttlebug Tiny Tags die, Spellbinder Labels 12 dies, Sizzix embossing folder from Powdered Sugar/Snow Globe Textured Impressions set #657065, Stampendous Cotton White Fun Flock
mixed with Crystalina glitter, Designer Dries Clear adhesive, sparkly green ribbon, green button, green sewing thread, Basic Grey red rhinestones, dimensionals, 140lb
Watercolour paper, small round paintbrush, Faber Castell + Derwent
Inktense watercolour pencils, Kindyglitz Crystalina, cardstock: red, green
Labels:
Christmas,
Cuttlebug,
Elzybells,
Fun Flock,
Penny Black,
Sizzix,
Spellbinder,
Watercolour pencils
Subscribe to:
Posts (Atom)