Saturday, April 29, 2023

Stampin' Up Beautiful You 21st Birthday Card and Gift Box

 
Hi everyone 😊

Today I am sharing a card and gift box that I made for my niece's 21st birthday.  My niece had a party in a restaurant which I thought was a great idea when there are alot of people invited.  Much easier to cater for and you don't have to clean up afterwards LOL!  My husband and daughter went along but I didn't due to my never-ending fatigue from long-COVID and I didn't want to be a wet blanket and ask to go home after just an hour of being there.  I was disappointed that I couldn't go but at least people are understanding of how debilitating long-COVID can be.


The main image and sentiment are from a retired set by Stampin' Up called Beautiful You.  I adore this stamp set and one that I will never part with.  I stamped the image using Versafine Onyx Black ink onto Ranger watercolour cardstock and coloured it with Lyra watercolour pencils and a #2 round paintbrush.  I think it took me about 3 minutes to colour it!  I diecut the image using my Big Shot and a Lifestyle Nesting Circle die and layered it onto the peach designer paper then diecut a scalloped circle from the darker blue designer paper.

All the papers are my Mintay - Harmony.  Aren't the colours gorgeous?!  

For the LHS panel, I dry embossed the peach designer paper with a retired Cuttlebug Textile embossing folder.   I have really been enjoying using my embossing folders again.  They kind-of fell out-of-favour for quite a few years but with all the amazing 3D embossing folders now available, they are back on-trend.  The blue designer paper was punched using a Martha Stewart Lace Doily edge punch.  I tied on some peach organza ribbon then threaded some peach/gold twine through a gold heart charm and glued that underneath the organza ribbon using fabric glue.  The twine came in a pack of 6 from KMart.  

The sentiment panel was diecut using a retired Spellbinders Shapeabilities Labels Trio die and popped up on dimensionals.  

The peach diamantes on the top RHS I bought on EBay ages ago.  It was a bulk lot of all sorts of colours.  I glued them on using Helmar 450 glue.

Once I had finished the card front, I glued it onto a white card base using Tombow Mono Multi glue.

I decorated the card inside too.  Please excuse the quality of the image but I took it very late in the afternoon and the light was dreary and no amount of editing seemed to improve it much.  Oh well!


The sentiment is also from the Beautiful You stamp set.  I added a strip of leftover designer paper then added the stickers on the LHS from the Mintay Harmony Cardboard Sticker sheet.  

Here is the gift box:


This was a last-minute make so by the time I finished it to photograph it, the light was terrible for photographing.  The box is by Stampin' Up and has been in my stash forever and retired.   I wrapped some designer paper around the box then punched two tiny holes using a retired Stampin' Up 1/16" Hole Punch.  I bought this punch on clearance and it is very handy when you only want a tiny hole in something.  I threaded the peach/gold twine through the holes.  The sentiment is also from the Beautiful You stamp set.  I diecut the sentiment using a Spellbinders Oval Nestabilities die and popped it up on dimensionals.   I ended up stamping the sentiment 3 times after smearing it when I diecut it because I was too impatient to let it dry!  Amazing how you just don't think when you are under time-pressure!   The gold stickers are also from Stampin' Up but long retired.

Here is another photo of the box from the side:


And a photo of the back:  


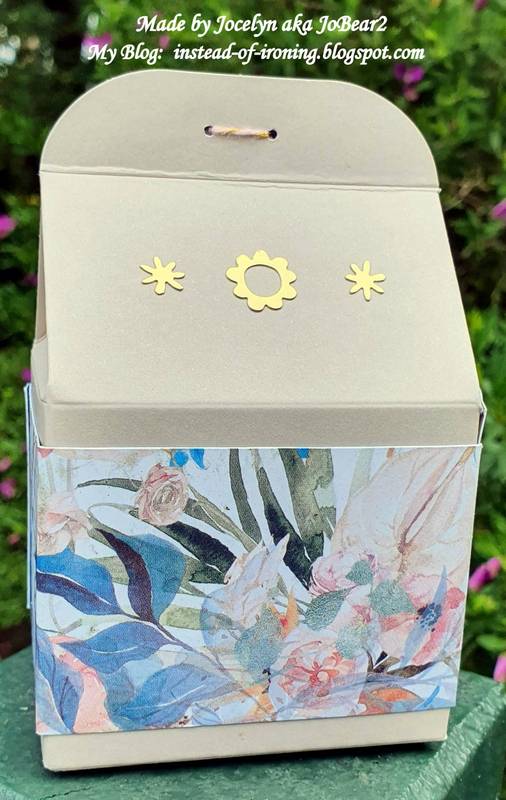
I popped a pair of earrings in a small organza bag into the box and nestled them in some gold tissue paper.  I bought the earrings from my local Pharmacy which has some beautiful giftware but they didn't come in a box so I had to put my thinking cap on for how to wrap them and to make them look elegant.  I was really pleased with how the box turned out and I love how the box matches the card.

Thanks for stopping by!

Jocelyn


Card Recipe:

Stamps:  Stampin' Up Beautiful You (retired)

Ink:  Versafine Onyx Black

Designer Paper:  Mintay Harmony 6" x 6" paper pad + 12" x 12" papers + Sticker Sheet

Accessories:  Big Shot, Cuttlebug Textile embossing folder (retired), gold heart charm (stash), 1" wide peach organza ribbon (stash), peach/gold twine - KMart, Lyra watercolour pencils, #2 round paintbrush, dimensionals, Helmar 450 glue, Tombow Mono Multi glue, fabric glue, peach diamantes, Wink of Stella clear glitter brush, white card base, Ranger watercolour cardstock

Dies:  Spellbinder Shapeabilities S3-147 Labels Trio (retired), Lifestyle Nesting Circles + Scalloped Circles

Punches:  Martha Stewart Doily Lace Edge


Gift Box Recipe:

Stamps:  Stampin' Up Beautiful You (retired)

Ink:  Versafine Onyx Black

Designer Paper:  Mintay Harmony 6" x 6" paper pad

Accessories:  Stampin' Up Kraft Gift Box (retired), Stampin' Up gold stickers (retired), Stampin' Up 1/16" hole punch (retired), Big Shot, doublesided tape, dimensionals, peach/gold twine - KMart, white cardstock scrap

Dies:  Spellbinder Scalloped Oval Nestabilities


Thursday, April 13, 2023

Penny Black Dancing Chick Easter Card

 
Hi everyone 😀

My Craft Room has been a whirl of activity - partly from revamping my room after the purchase of some second-hand Ikea units off Facebook Marketplace for only $20 - and from making a couple of cards in amongst the total chaos of it all.  I started revamping my room in December but then COVID struck and I have been very tired ever since.  Little by little, I am getting things sorted out but can't do too much so it's been more than a little frustrating! 😒 

The card I am sharing today is an Easter card that I made for my daughter.  This is also my card for the following Challenges:

Penny Black Saturday Challenge - April - Anything Goes with option of Something Funny

Creative Knockouts - #491 - 2 or more Patterned Papers

Splitcoaststampers - Free for All Friday F4A684 - Easter


The main image is a retired Penny Black wood-mounted stamp called 'Dancing Chick'.  I have had this stamp for many years and I just love how joyful that little chick is.  I stamped the chick using Versafine Onyx Black ink onto Ranger watercolour cardstock and coloured it with a mix of Jasart Voyager watercolour discs and Faber-Castell watercolour pencils using a #2 round paintbrush.  I diecut the image panel using Lifestyle/Quickutz Nesting Card Templates dies and my Big Shot.

The larger hearts around the chick are a die from Impression Obsession - Mini Heart Row - and the tiny hearts are the leftover punchies from my EK Success Arrows border punch.  I glued them on using Tombow Mono Aqua glue.

The designer papers are by American Crafts - Hello Spring - from 2016 so long-retired.  Just love the bright colours in this paper pad!  All the layers on my card are designer paper.

The sentiment is by Memory Box - Springtime Bunnies - another older set - and was stamped using the same black ink.  I diecut it using a Spellbinder Shapeabilities Labels Trio die then added 2 x 4mm aqua Crafter's Choice Bling.

Both the sentiment and main image panel are up on dimensionals.

I added some Stampin' Up! Dazzling Details glitter glue to the hearts, flowers and the bunny's cheeks.

Once I had finished the card front, I attached it to an Anko white card base using Tombow Mono Multi glue.  I buy all my card bases from KMart as they are a great value for money.

We had a quiet Easter break and just enjoyed our time together and having a break from working.  It was really cold and wet so we lit the slow-combustion fire and hunkered down inside.  I pity anyone who went camping as it would have been miserable!

Thanks for stopping by!

Jocelyn


Card Recipe:

Stamps:  Penny Black 'Dancing Chick' 2564F wood-mount, Sentiment - Memory Box Springtime Bunnies CL5169 clear

Ink:  Versafine Onyx Black

Designer Paper:  American Crafts - Hello Spring 6" x 6" pad (retired) - from 2016

Accessories:  Stamping Platform, Big Shot, Tombow Mono Multi and Mono Aqua glue, dimensionals, Crafter's Choice Bling VE077, Jasart Voyager watercolour discs, Faber-Castell watercolour pencils, #2 round paintbrush, Stampin' Up! Dazzling Details glitter glue, Ranger watercolour cardstock, Anko white card base (KMart)

Dies:  Spellbinders Shapeabilities Labels Trio S3-147 (retired), Liftstyle/Quickutz Nesting Card Templates DCO431, Impression Obsession Mini Hearts Row DIE134-D

Punches:  EK Success Arrows border


Monday, April 10, 2023

Penny Black Don't Break It Anniversary Card

Hi everyone ðŸ˜€

It is my husband's and my 34th Wedding Anniversary and this is the card that I made for him.  My husband is easy to make cards for because he doesn't mind cute and cuddly critters so that makes life a little easier.  The Penny Black critters are so timeless and adorable - and I have been using their critters for years and years.


The main image is called 'Don't Break It!' and is wood-mounted - and still readily available.

This is also my card for the following Challenges:

Penny Black Saturday Challenge - April - Anything Goes - Optional of Something Funny

Crafty Catz Weekly Challenge - #632 - Anything Goes - Optional Twist of Something Blue

Splitcoaststampers - Ways to Use It - WT920 - Teddy Bears

I stamped the image using Versafine Onyx Black ink and coloured it with a mix of Jasart Voyager watercolour paints and Faber-Castell watercolour pencils using a #2 round paintbrush.  I added some Glossy Accents to the heart that the teddy bear is holding.   I went over the black lines of the image with a Zig Millenium .005 black pen which had lost some of their blackness from the watercolouring.  The hearts around the image and sentiment are a mix of Sizzix Drifting Hearts Thinlets and leftover punchies from using my EK Success Arrow border punch.  I cut them from some of the designer paper.

The designer papers are really old - from 2012 - and are by Bo Bunny - Love Letters from their 6" x 6" paper pad.  Although you can no longer get them, there are so many Valentine's Day releases that you could substitute.

I diecut the main image using a Lifestyle Nesting Circles die using my Big Shot.  The red circle underneath was diecut from one of the designer papers and the black circle is American Crafts black cardstock.

I added a strip of black cardstock underneath the image and it looked like it needed something so added some dry embossing using a Cuttlebug/Provocraft Love Language embossing folder.

Here is a close-up of that adorable teddy-bear:


The sentiment is by Colorado Craft Company - Lots of Love and was stamped using Versafine Onyx Black ink.  I diecut it using a retired Spellbinder Labels Trio Shapeabilities die S3-147.   I added some more tiny hearts from my EK Success Arrows border punch.  All the hearts were glittered using my Wink of Stella clear glitter brush which adds some subtle sparkle so it is isn't too tizzy for a guy 😉

Both the main panel and sentiment are up on dimensionals.  Once I had finished the card front, I attached it to a white card base.

Thanks for visiting my blog today.

Jocelyn


Card Recipe:

Stamps:  Penny Black 'Don't break it!' 3605F wood-mount, Colorado Craft Company 'Lots of Love' AJ418 clear set

Ink:  Versafine Onyx Black

Designer Paper:  Bo Bunny Love Letters 6" x 6" pad (2012) - retired

Accessories:  Big Shot, Ranger watercolour cardstock, Cuttlebug/Provocraft Love Language embossing folder (retired), dimensionals, Tombow Mono Multi glue, Wink of Stella clear glitter brush, Glossy Accents, Jasart Voyager watercolour discs, Faber-Castell watercolour pencils, #2 round paintbrush, Perfect Layers Tools, Zig Millenium .005 black pen, Stamping Platform, cardstock - American Crafts black, white card base (Anko - K-Mart Australia)

Dies:  Sizzix Drifting Hearts Thinlets #663451A, Spellbinders Labels Trio Shapeabilities S3-147 (retired), Lifestyle/Quickutz Nesting Circles L-CC-001

Punches:  EK Success Arrows border


Related Posts Plugin for WordPress, Blogger...